Automatically Push Files
Overview
In the AgileData App, it is not only possible to collect data from external SaaS applications like Shopify or Salesforce. You also have the option to upload files in a variety of formats.
Manually uploading data can get tedious if you have to upload a lot of files at once or would like to automate the upload process.
In this case, the AgileData Platform supports the automated push of files into a secure Google Cloud Bucket, from which the data gets automatically collected and populated into History Tiles.
The path to the Google Cloud Bucket, also called FileDrop Bucket, as well as the credentials to authenticate the connection, can be obtained from within the AgileData App. After configuring the connection between your machine and the FileDrop Bucket, all you have to do is to copy or drop files into the bucket and the data will automatically appear in the catalog of the AgileData App as new or updated History Tiles.
Once the data from the files have been collected into the History Tile, the files are automatically archived in a secure Audit Bucket. This way, you can easily set up your own automated data pipeline between your local machine and the AgileData Platform and simplify the process of uploading data in a simply magical way.
Steps
1. Obtain the path and keyfile of your FileDrop Bucket
To get started with setting up the automated upload of your files, you need to get the path, the credentials and access to your keyfile for the FileDrop Bucket of your private AgileData Tenancy.
You can find this information within the AgileData App.
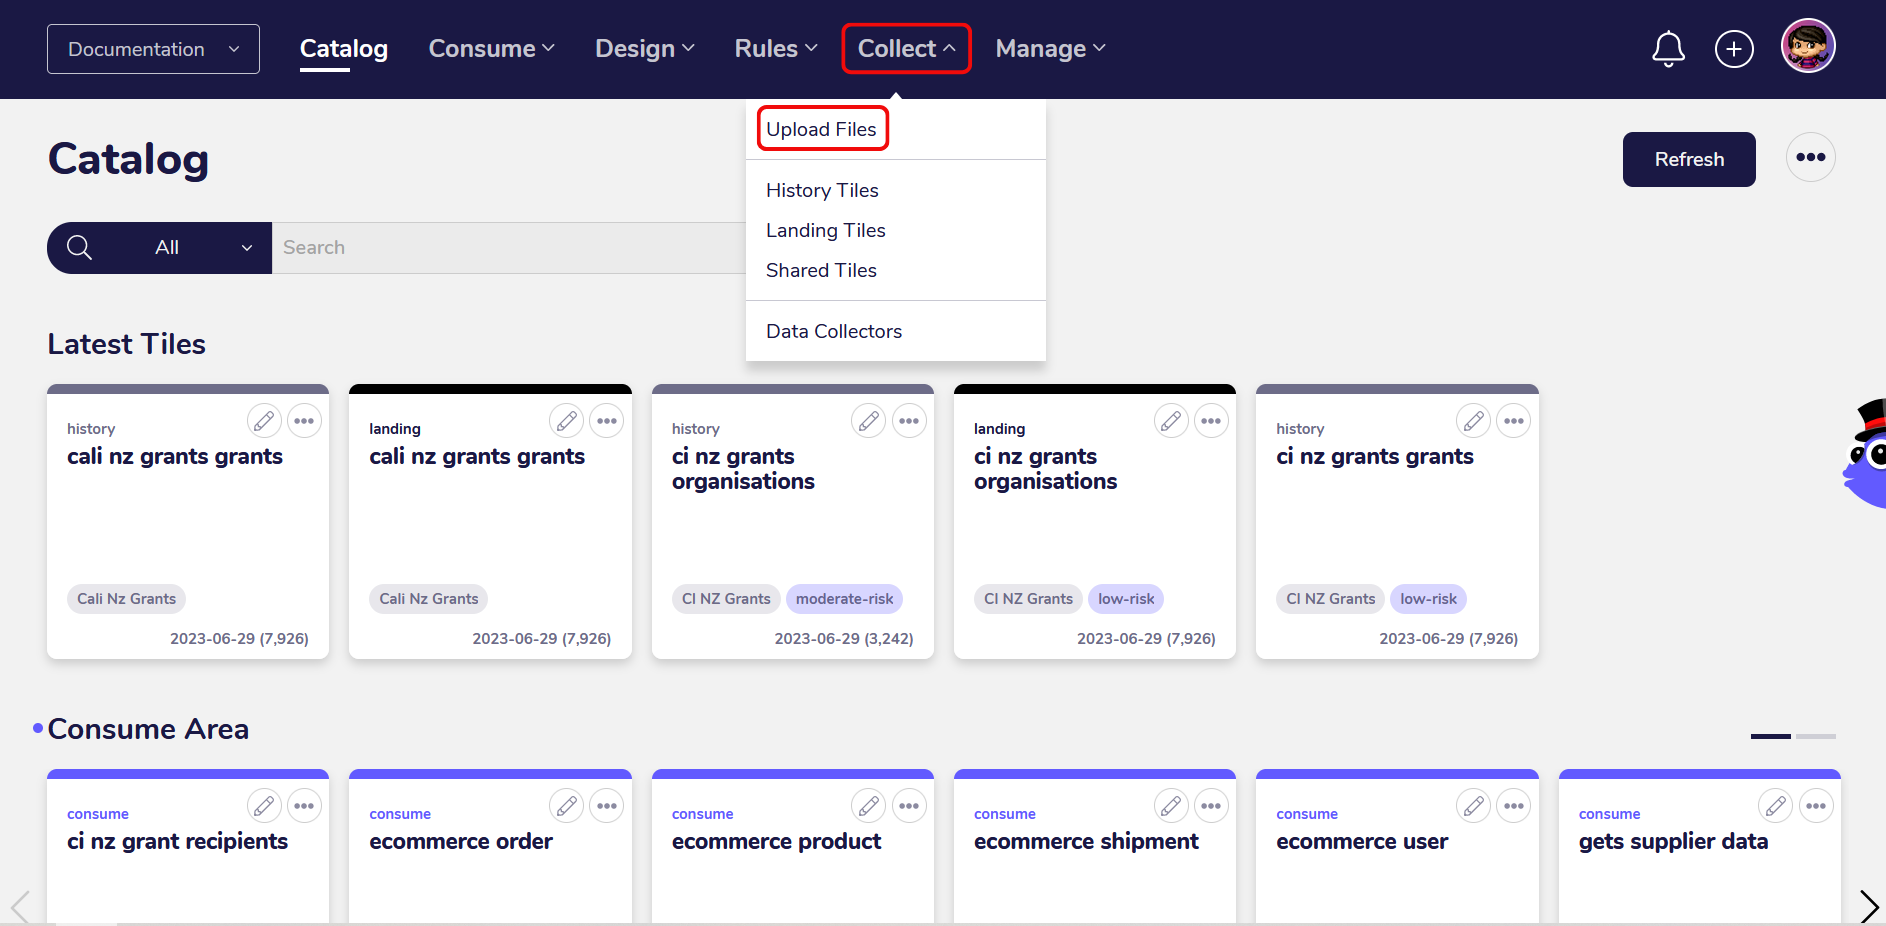
Select “Collect” in the Catalog and click on “Upload Files”.
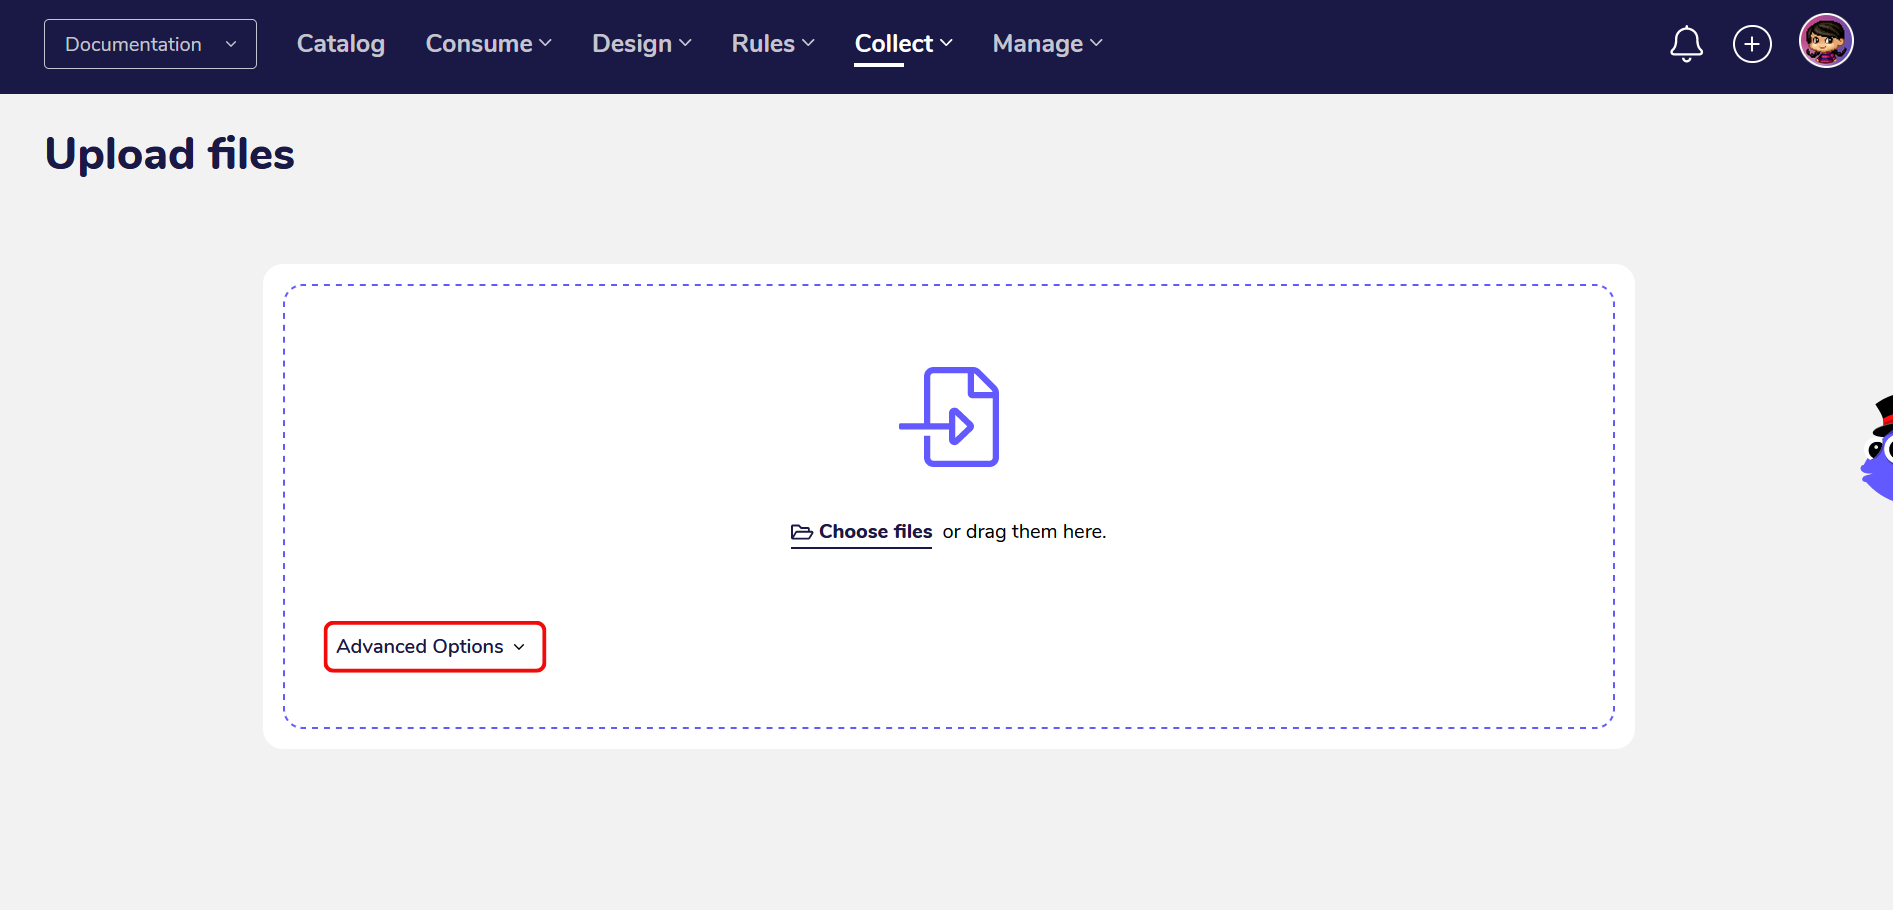
Click on “Advanced Options” to expand the information about your FileDrop Bucket.
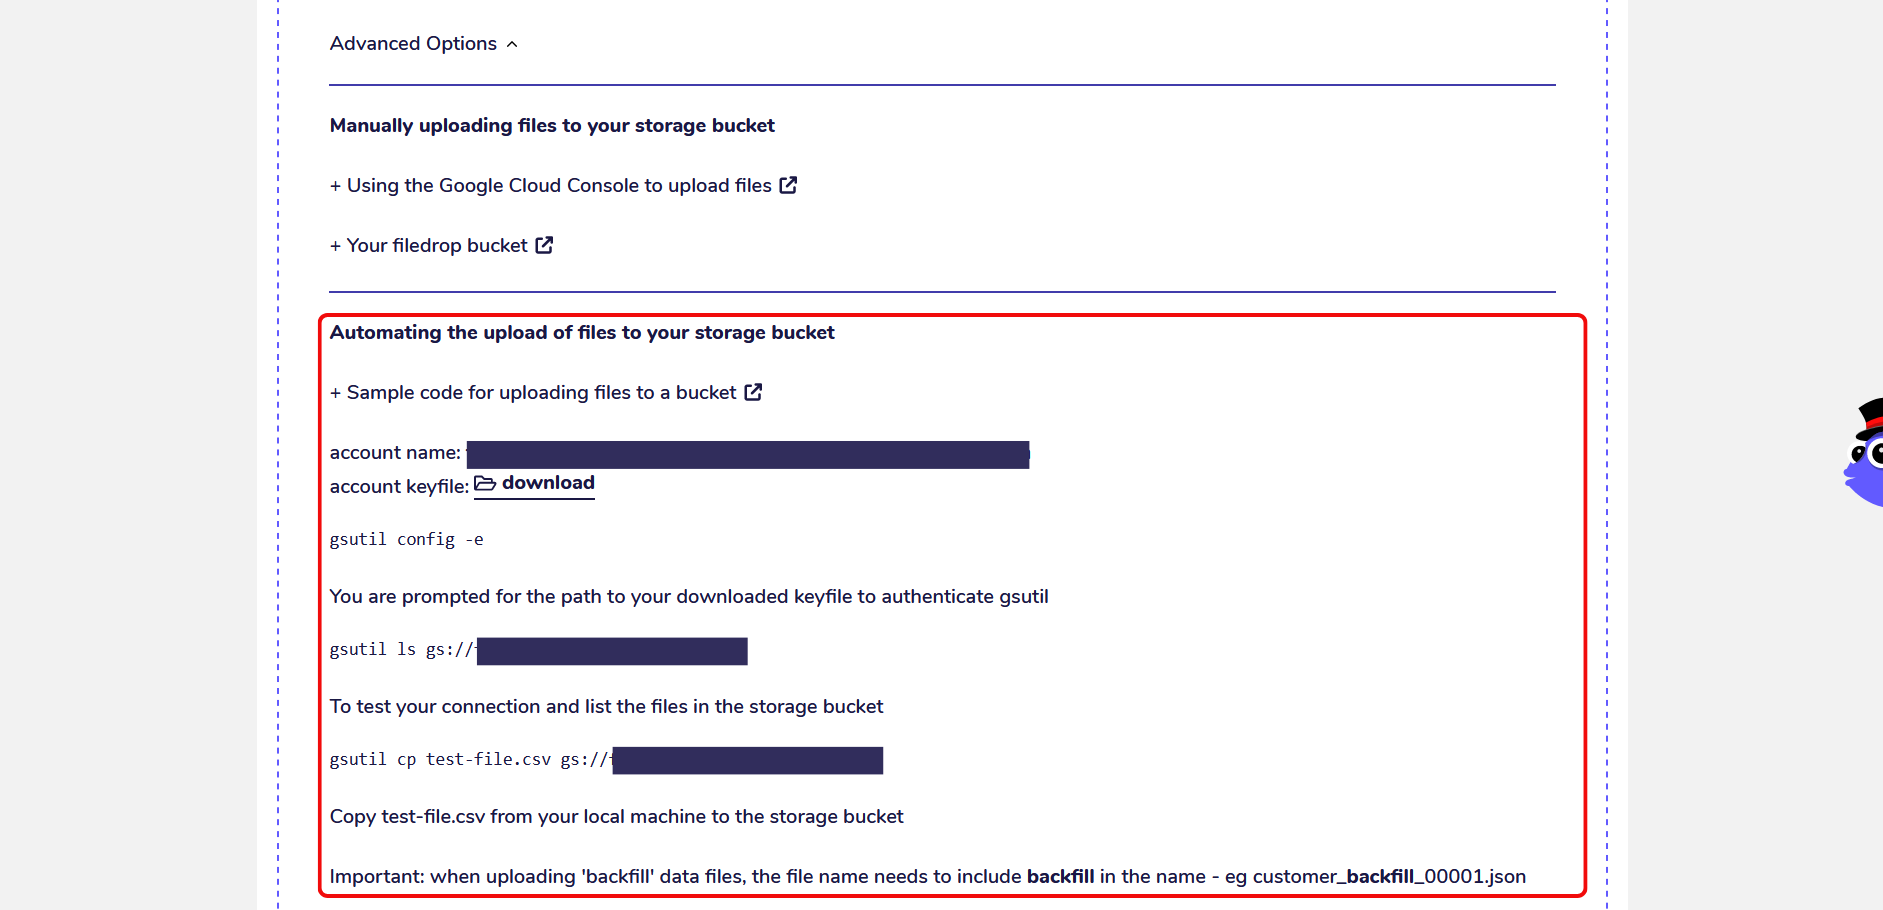
Under the section “Automating the upload of files to your storage bucket” you can find the path to the FileDrop Bucket of your private AgileData Tenancy, your credentials and access to download your keyfile.
You can also find further instructions on how to connect to your FileDrop Bucket and upload files to it from your local machine.
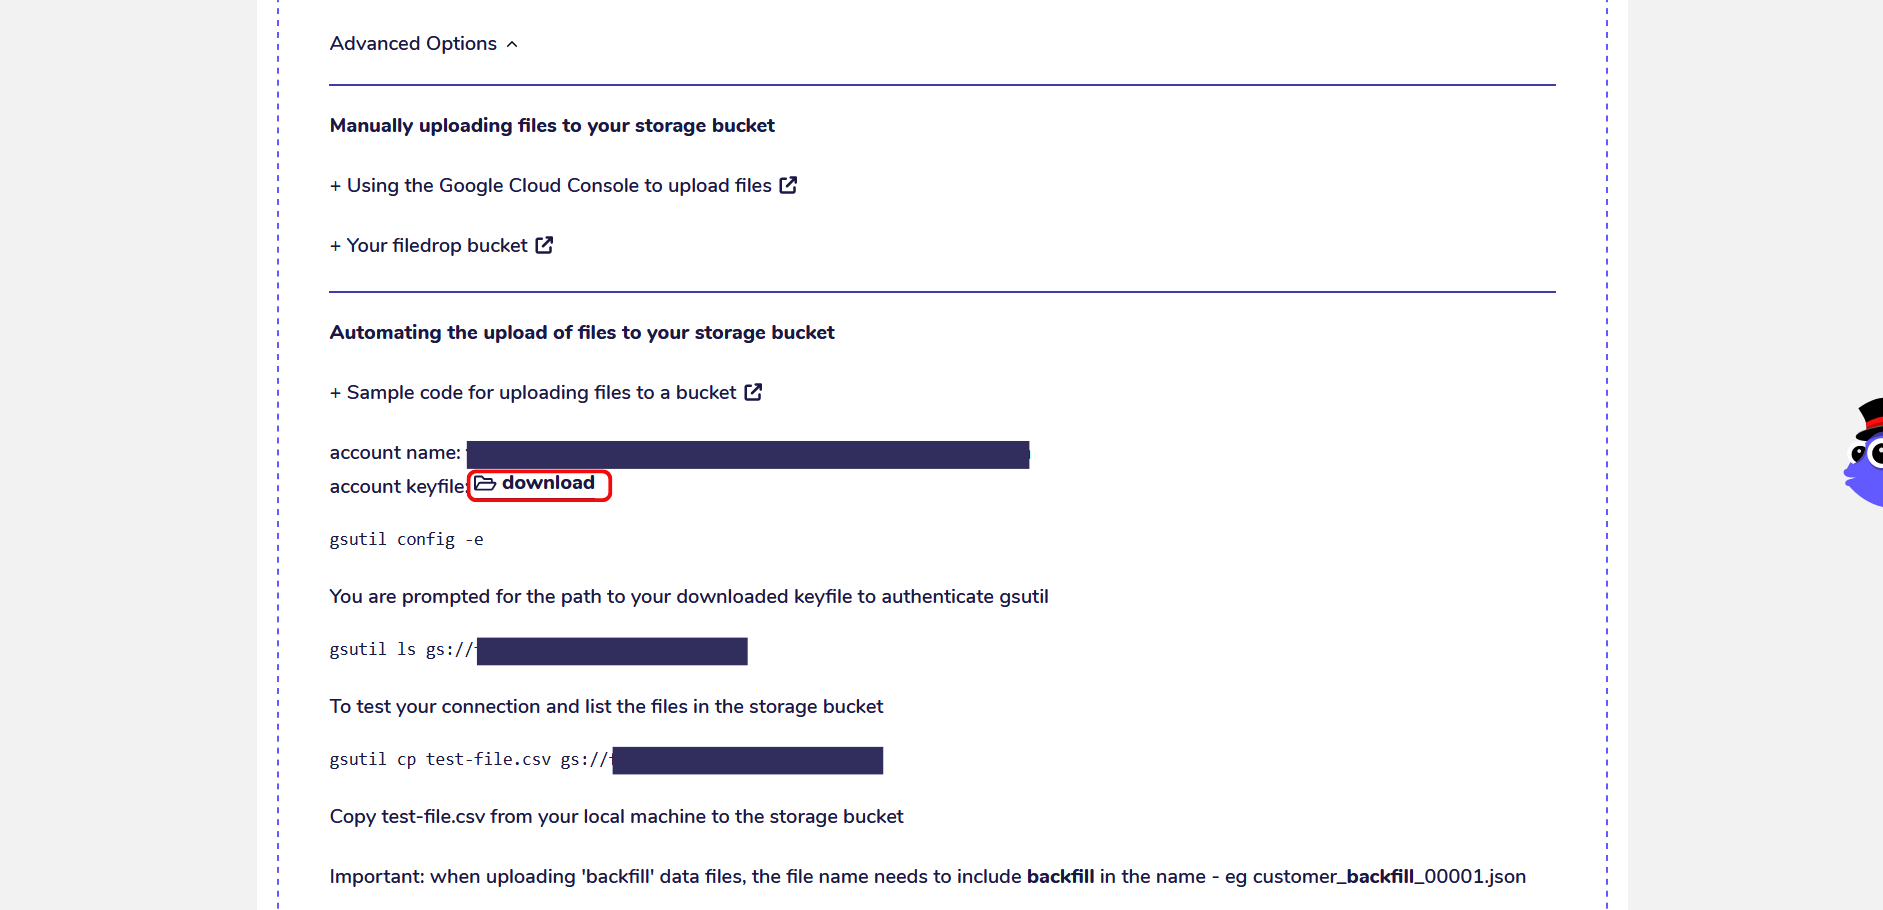
The keyfile is a file containing encryption keys and works as a second factor of authentication.
To access your FileDrop Bucket from the command line you need to download the keyfile to your local machine which you can do by clicking on “Download”.
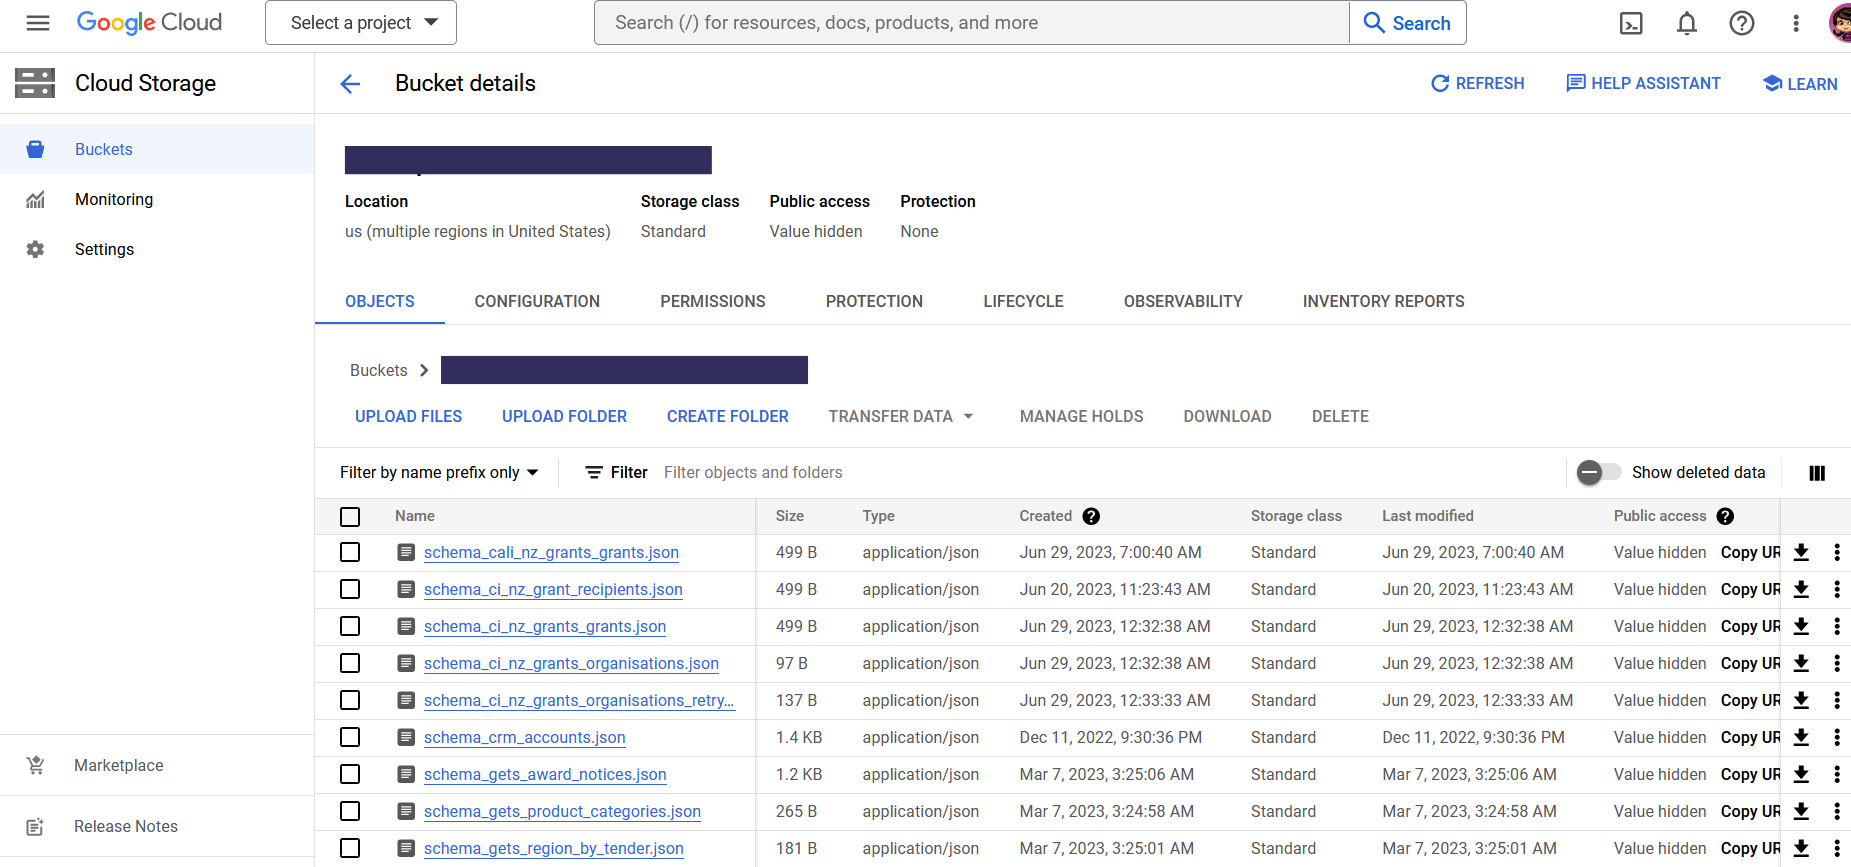
Google Cloud Storage Buckets are containers in Google Cloud Storage to store objects, for example data files.
You can access Google Cloud Storage Buckets either through the Google Cloud Console which provides a visual interface to manage your files or through the command line by using a tool called gsutil. Each Google Cloud Storage Buckets have a unique path that starts with the prefix gs://.
By clicking on “Your FileDrop Bucket” you can open your bucket in a separate tab in the Google Cloud Console and view its current contents.
2. Set up the connection to your FileDrop Bucket with gsutil
To establish and authenticate a connection between your FileDrop Bucket and your local machine you need to use gsutil.
gsutil, also called Google Storage Utility, is a command-line program that enables you to access and manage resources in Google Cloud from the terminal without requiring the Google Cloud Console. Using the terminal to manage files in your Google Cloud Buckets is a faster and easier way to automate the bulk-upload of data files.
gsutil is a part of the Google Cloud SDK, a set of command-line tools to manage and interact with resources and services by GCP (Google Cloud Platform). You can download gsutil either as a part of the Google Cloud SDK or by following instructions for an individual installation. You can find further information about gsutil and its commands in the official documentation by Google.
To check whether you have gsutil installed on your local machine, open the terminal/command line and execute the following command:
gsutil version -l
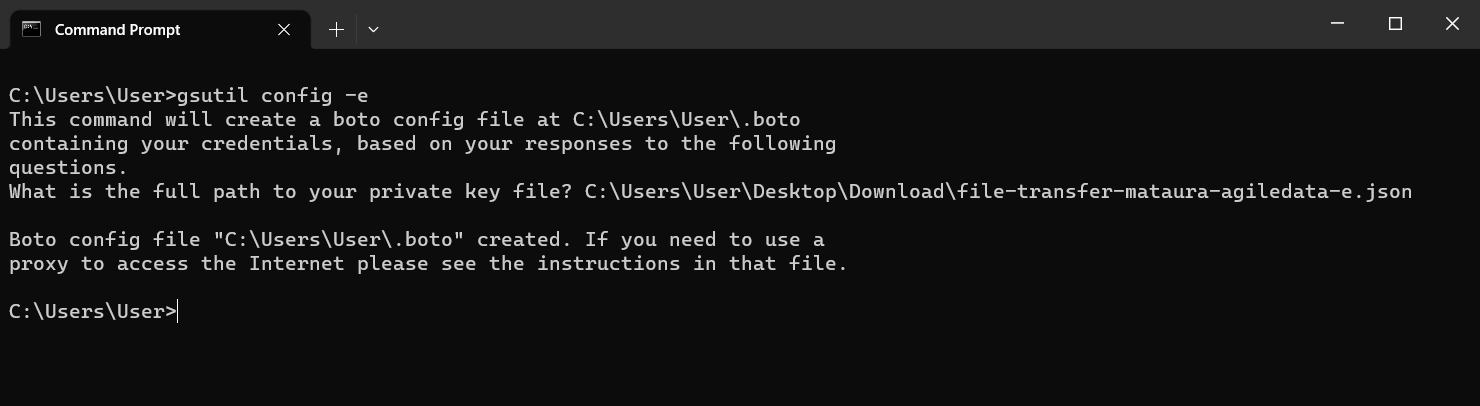
To authenticate your connection, use the config command:
gsutil config -e
You will get prompted to enter the path to the keyfile you downloaded which gets saved as a .json file on your local machine.
To test the connection to your FileDrop Bucket, you can list its contents with the ls command:
gsutil ls gs://your_bucket_path

3. Upload files to your FileDrop Bucket
To automatically collect data to the AgileData Platform, you need to upload files into your FileDrop Bucket. Once a data file has been uploaded to the bucket, it is automatically collected and loaded into a History Tile in the catalog of the AgileData App.
There are two ways to upload files to a Google Cloud Bucket. If you’re using the terminal, you can utilize the cp command to copy files or the mv command to move files with gsutil.
gsutil cp your_file.csv gs://your_bucket_path
gsutil mv your_file.csv gs://your_bucket_path
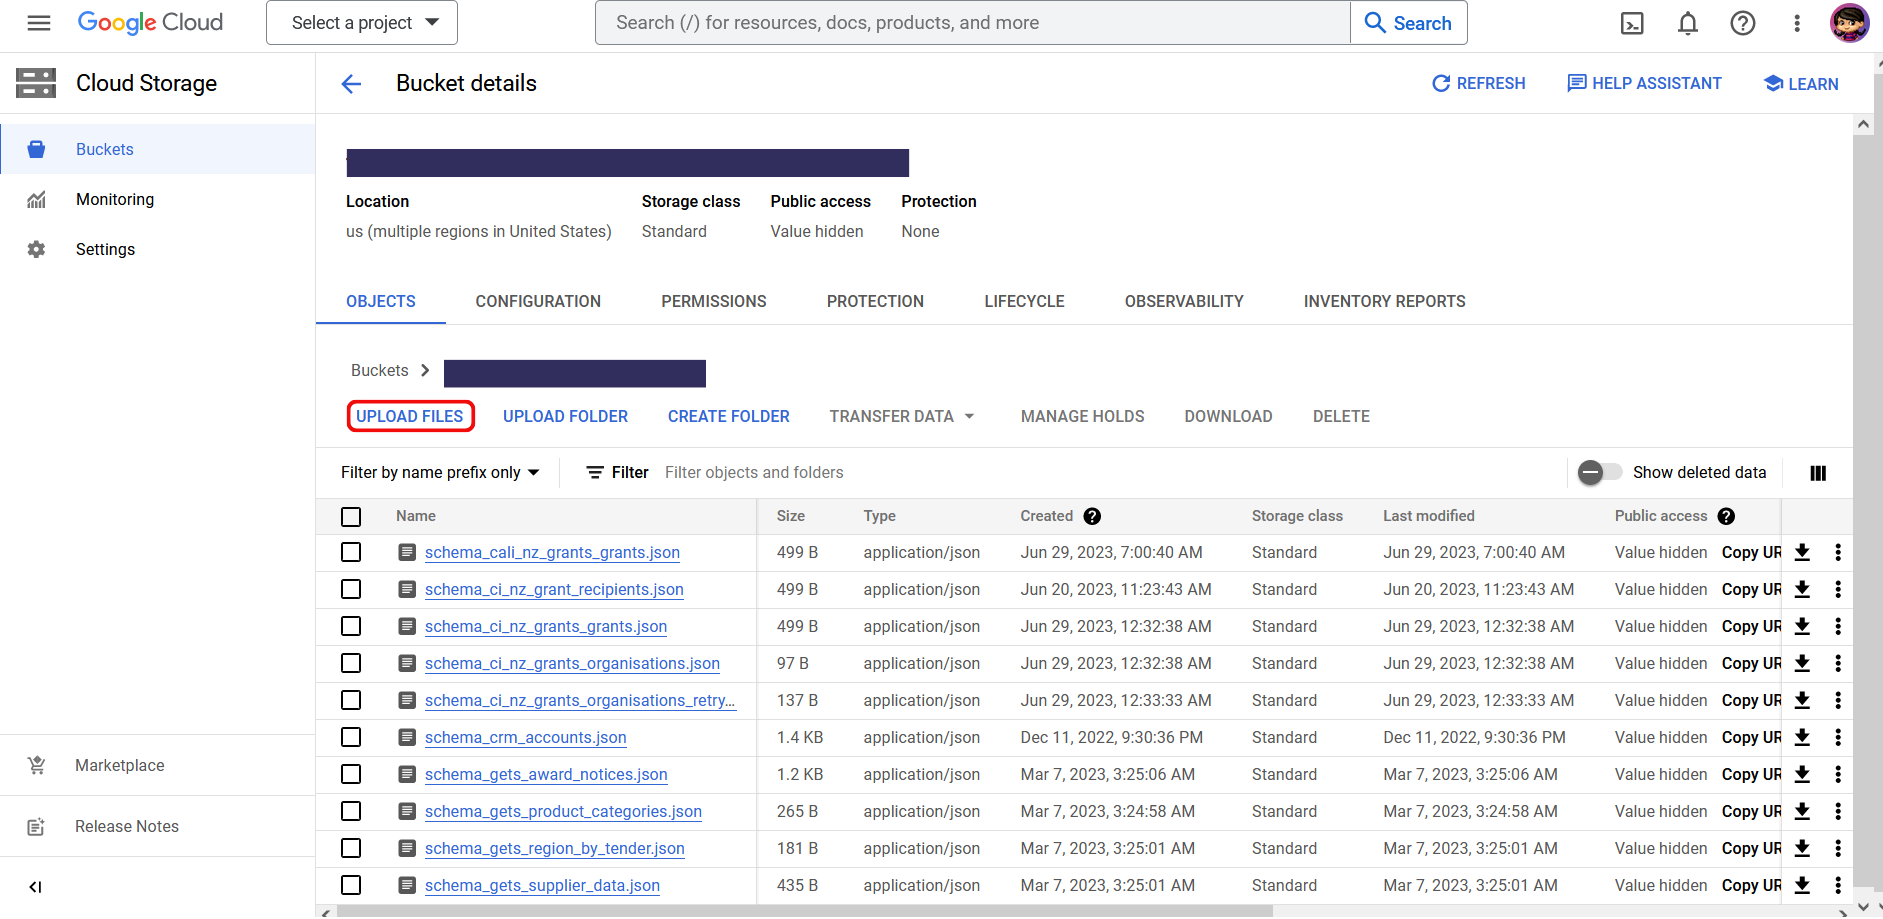
Alternatively, you can use the Google Cloud Console to manually upload files in the visual interface.
Open your FileDrop Bucket, click on “Upload Files” and select the files you want to upload from your local machine. You can find more information about the file upload in the Google Cloud Console in the official documentation.
4. Supported File Types
Both the automated and manual upload capability supportes 3 different file types:
Text files (.txt. .csv): CSV files, short for Comma-Separated Values, save data in tabular format as a simple text file. Values get organised in rows and separated by a comma as a delimiter. A header row denotes the column names but otherwise, you can’t add any formatting or metadata to the file. CSV files are a lightweight option to save your data and can get easily read by most programs. They are less prone to corruption than other formats.
Excel files (.xls): Excel files save data in spreadsheets that consist of cells and get organised in workbooks and tables. Contrary to CSV files, you can add formatting, filters, validation rules and metadata, making it easier to organise and label your data. On the flip side, Excel files are heavier than CSV and take longer to load and transfer. In addition, Excel is a proprietary file format by Microsoft, leading to compatibility issues between different versions and when using third-party tools.
Newline Delimited JSON files (.ndjson): Newline Delimited JSON is a special JSON file format in which each line is a valid JSON text that gets delimited with a newline character. Usually, JSON, standing for JavaScript Object Notation, saves data in plaintext JavaScript objects or arrays. JSON is often used for data that gets sent via HTTP request or response between client and server programs of web applications. Newline Delimited JSON makes it possible to append new individual records to a JSON file on the go and is therefore a popular format for data streaming. The automated file upload option only supports Newline Delimited JSON and not standard JSON files.
It’s important to note that file names can only have a single dot. For example, abc.csv is a valid file name, but abc.def.csv isn’t. Otherwise, there are no restrictions for file naming conventions.
5. Backfilling Historical Data
If you want to upload backfill data, the file name needs to include “backfill” such as customer_backfill_00001.
Backfilling data means updating historical parts of a data asset that’s normally updated incrementally like adding new records to a table every day.
You usually need to do a backfill if you want to initialize a new data asset with historical data, overwrite old records of a corrupted data pipeline after fixing the bug or filling in the gaps of a data asset after a failure.
Backfills are typically difficult to manage in a data platform, but with the automated file upload, you can execute this advanced data pipeline operation magically into your workflow with AgileData.
6. Data from the files gets collected into History Tiles
After you copied or moved files into your FileDrop Bucket, the AgileData Platform automatically detects the arrival of new files and kicks off the process of data collection into History Tiles. The automated process of data collection works the same as if you would upload the files manually.
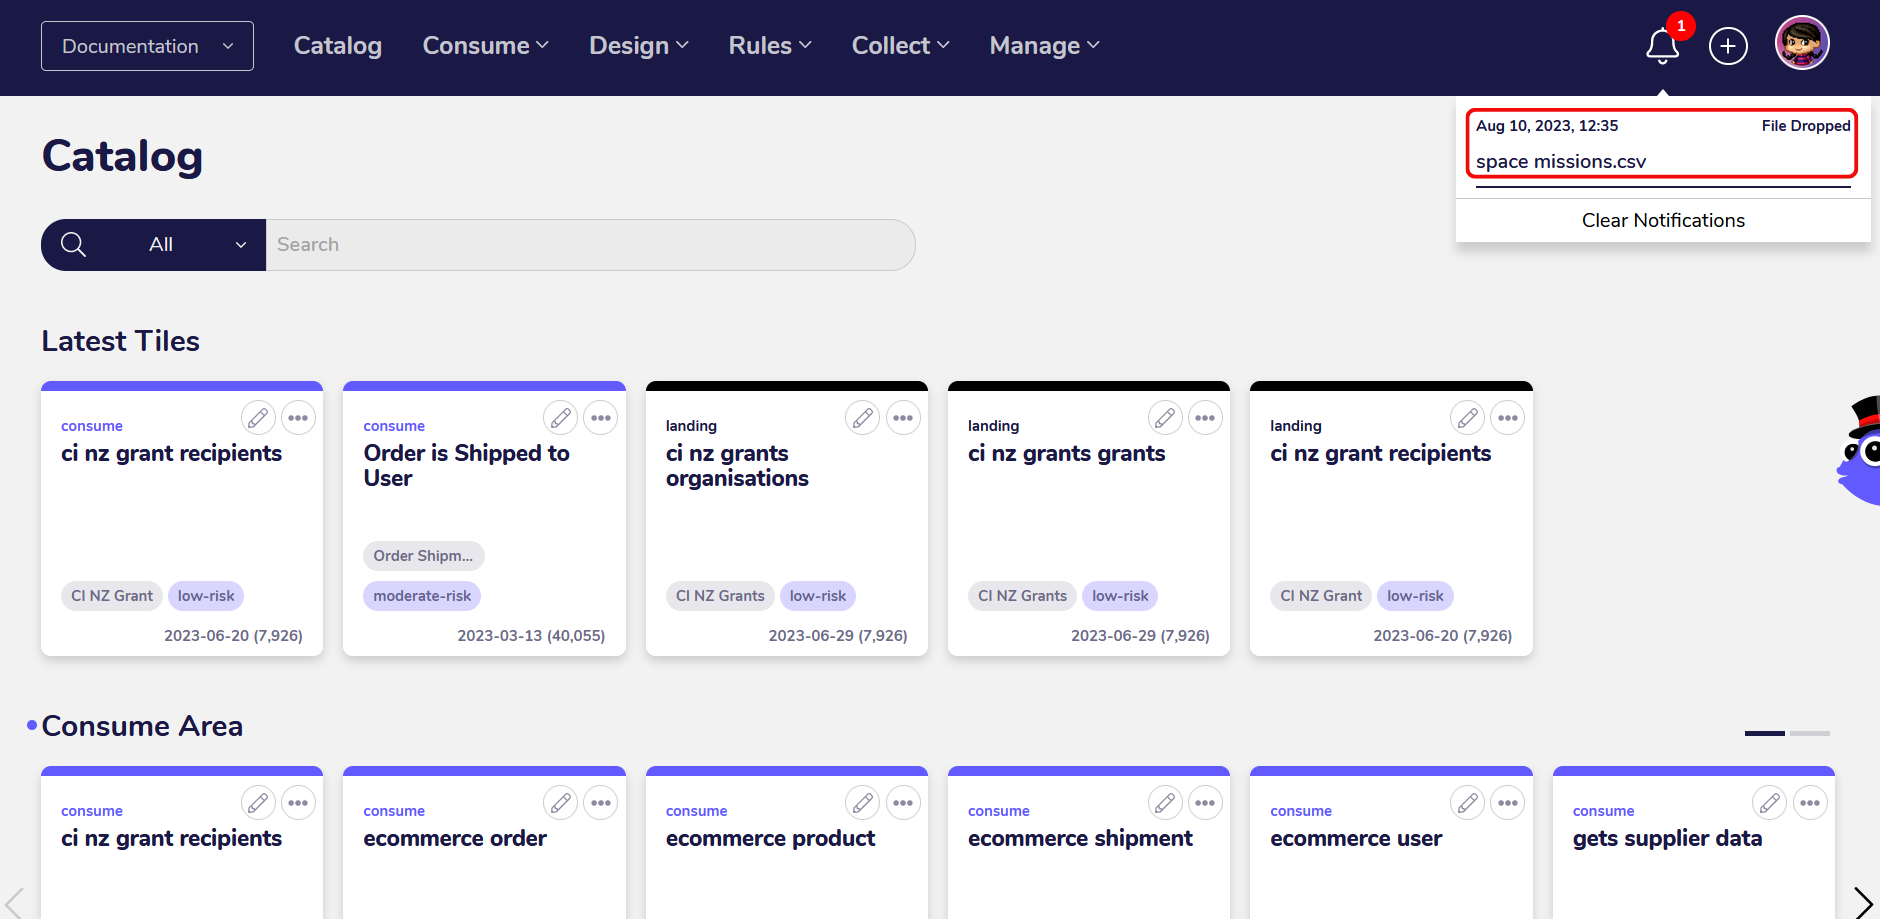
For this guide, we’re using a CSV file with data about space missions. The file has been uploaded to the FileDrop Bucket via the visual interface in the Google Cloud Console. Alternatively, we could’ve also used the command line with gsutil and the cp command.

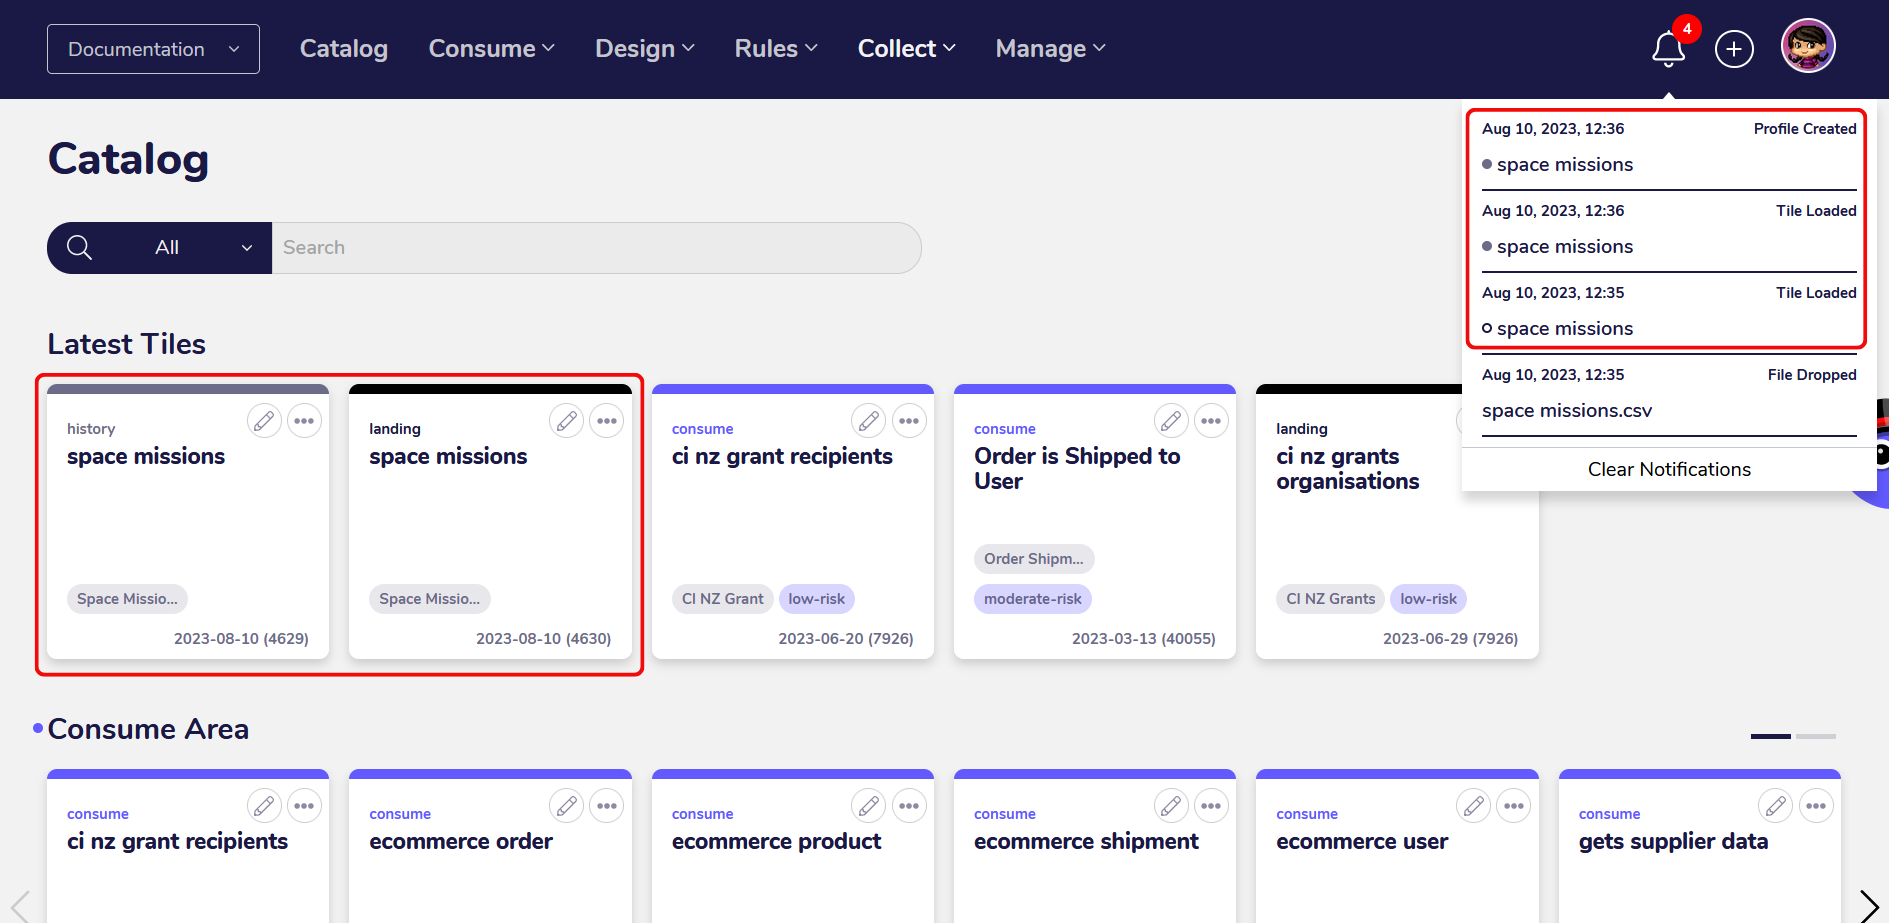
Once the file has been successfully uploaded, a notification will appear in the AgileData App, signaling that the new file in the FileDrop Bucket has been detected.
The data from the file gets collected into a Landing Tile and then into a History Tile, where it is automatically profiled and made available for data exploration, or for transformation via Change Rules.
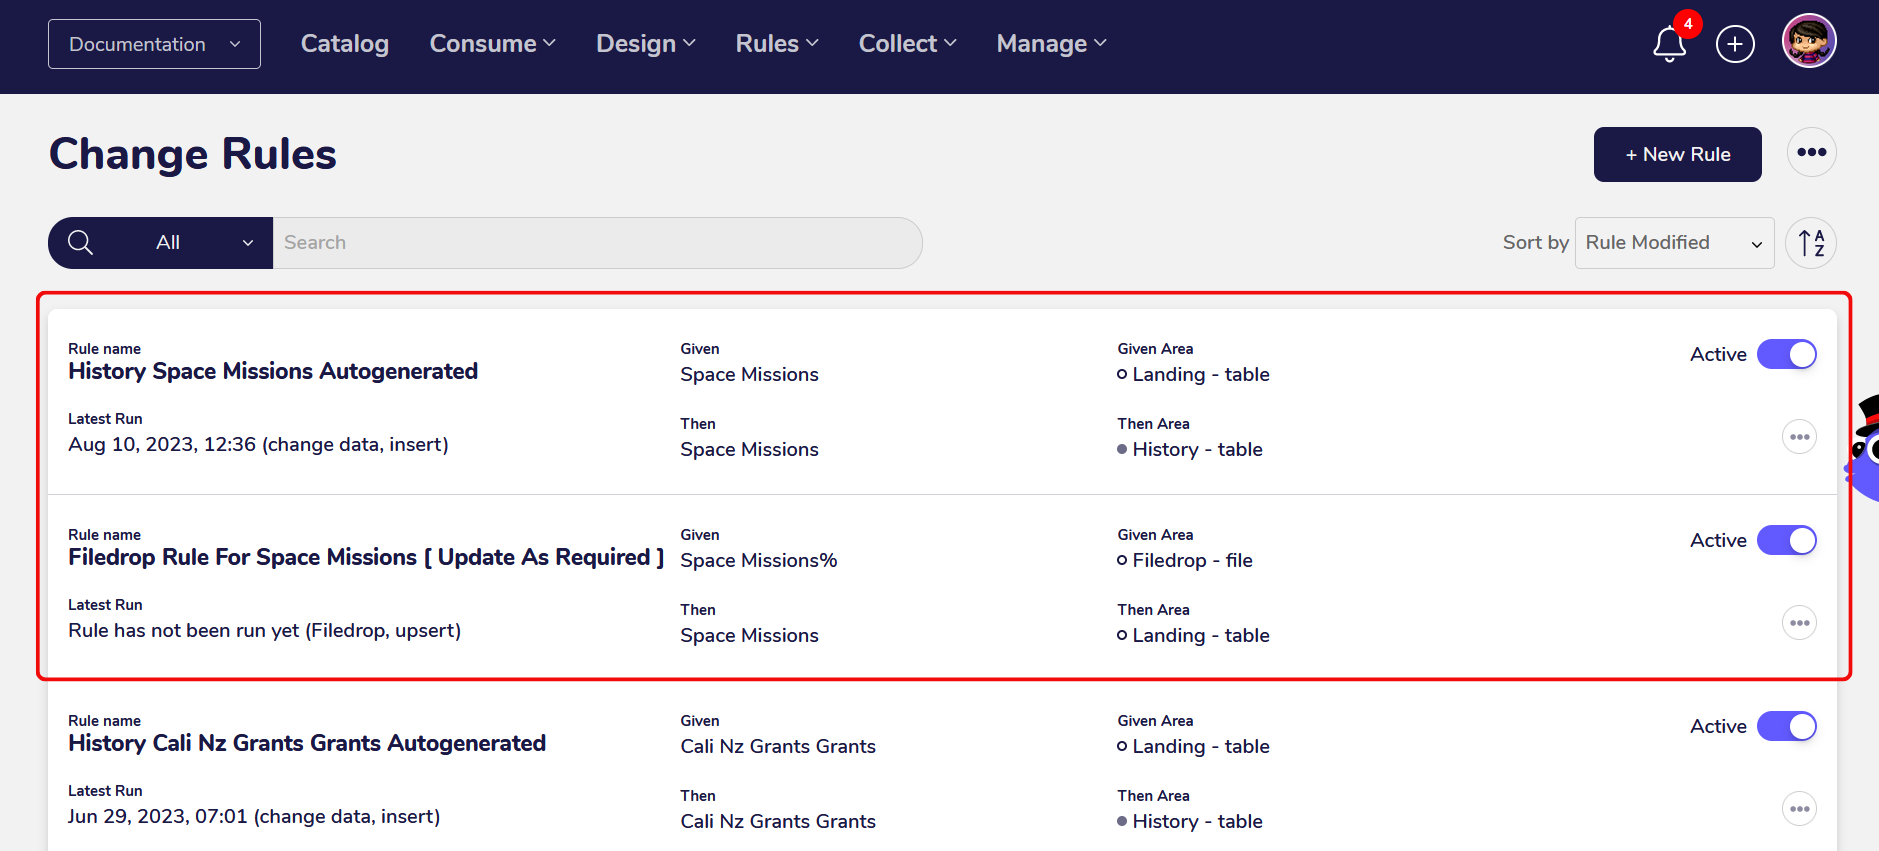
In addition, a new set of wildcard Change Rules are automatically created which you can view under “Change Rules”.
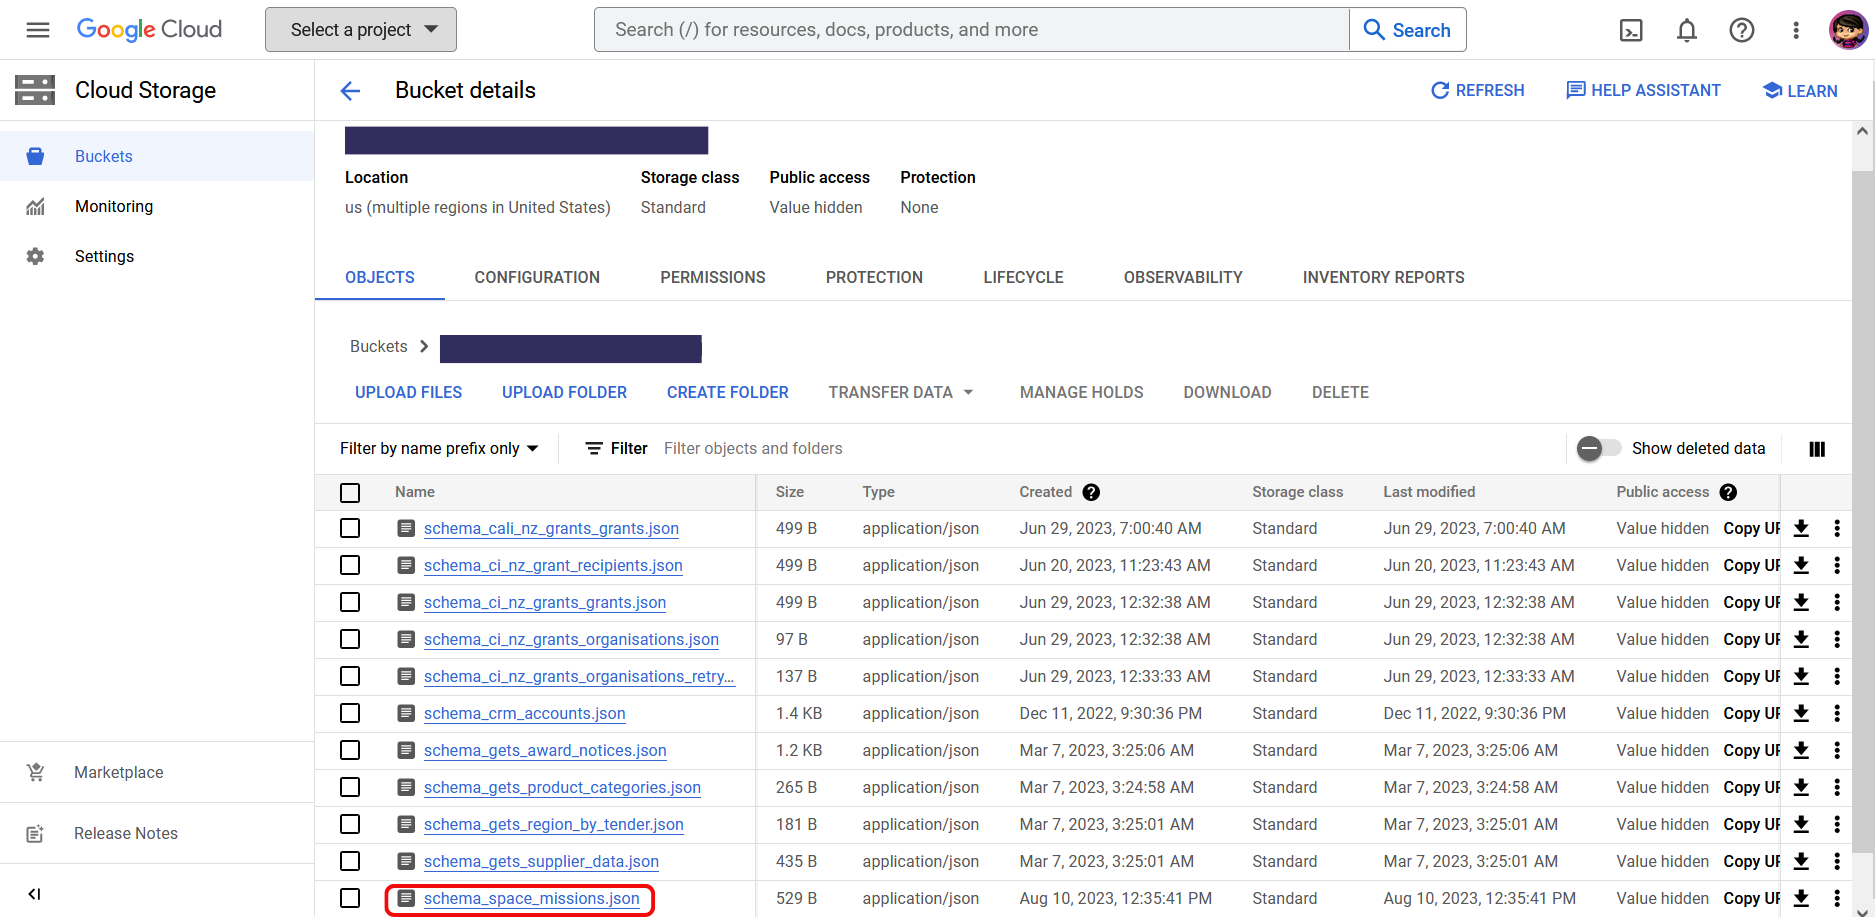
The schema of the file is automatically identified and gets set as part of the data contract for subsequent files that will get pushed into the FileDrop Bucket.
Once the data from the file has been successfully collected into a History Tile, the file gets removed from the FileDrop Bucket and archived in a secure Audit Bucket in your private AgileData Tenancy only.
If a file with the same file name or any wildcard variations of it gets pushed into the FileDrop Bucket again it will get validated against the schema set in the Data Contract.
If the schema successfully matches the schema of the Data Contract, the current wildcard Change Rule get automatically triggered and the data gets collected. The new records in the file will get appended to the existing History Tile and no new tiles will get created.
If the schema doesn’t match the data won’t get processed you will receive an error notification.
If AutoSync is enabled for the History Tile, all dependent rules will be triggered for execution once the History Tile has been successfully updated.
Use Cases
1. Create an automated data pipeline for your workflow
With the automated file upload, you can easily set up an automated Data Factory with AgileData.
A Data Factory transports raw data from various sources like files, APIs and databases to a data repository for storage and analysis. Along the way, the raw data gets transformed into a format that is readily usable for data analysis and exploration.
Raw data usually needs to get processed and transformed before you can begin with the data analysis or machine learning processes. The Data Factory automates this endeavor by executing a series of data processing elements that organise and structure the data you load into it. The automated file upload lets you automatically collect data from different file formats into the AgileData Platform, where it gets immediately profiled and displayed as a History Tile in the AgileData App.
There are different types of Data Factories you can set up.
A batch processing factory transports a large batch of data records at once, repeating the process at defined intervals which are usually scheduled during off-business hours.
A micro batch factory processes a small batch of data records on a regular basis, repeating the process at defined intervals which are usually triggered every 15 minutes, hourly or based on the number of data records in the file.
A streaming factory continuously uploads your data in real-time, which gets often used for web applications.
All types of factory processes are incredibly useful to accelerate your daily work as a data analyst or consultant.
2. Bulk upload data to AgileData
The automated file upload option is also the perfect solution to bulk upload data files to AgileData. If you set up your data pipeline with gsutil you can integrate your data operations with external command line scripts to further automate pushing your data files into the FileDrop Bucket.
Manually uploading a large number of files is tedious and can take up a lot of time. Setting up an automated solution with AgileData can help you to delegate this task to a script to save you time and effort so that you can focus on the essential aspects of your work instead. If you have many files to upload to the AgileData App at once, or you need them to be uploaded on a regularly frequency 24 x 7 the automated file upload can resolve the problem by only executing a few commands in the terminal.