Renaming Consume Fields
Overview
The Catalog screens in the AgileData App provides an overview of all Consume Tiles in your Tenancy. With one click you can view the data in the Tiles with Looker Studio and create reports for your organisation.
But sometimes the default field names AgileData provides to your reports can be long and cumbersome to deal with since they get automagically defined in the associated Consume rule.
Fortunately, the AgileData App offers an easy way to resolve this problem.
By creating a custom Consume Rule, you can rename Consume Fields in your Tiles and define pretty names that adhere to the business language or naming standards in your organisation. The results of the custom Consume Rule is saved in a Consume View which enables you to isolate the changes to the field names.
You can track your Consume Views in the Data Map, a screen in the AgileData App that provides you with an overview of all Tiles and the Rules connecting them.
After successfully renaming the Consume Fields in your new Consume Tile you can create reports in Looker Studio easier and faster, working with you custom field names instead of the autogenerated ones.
Steps
1. Open Consume Tile with Looker Studio
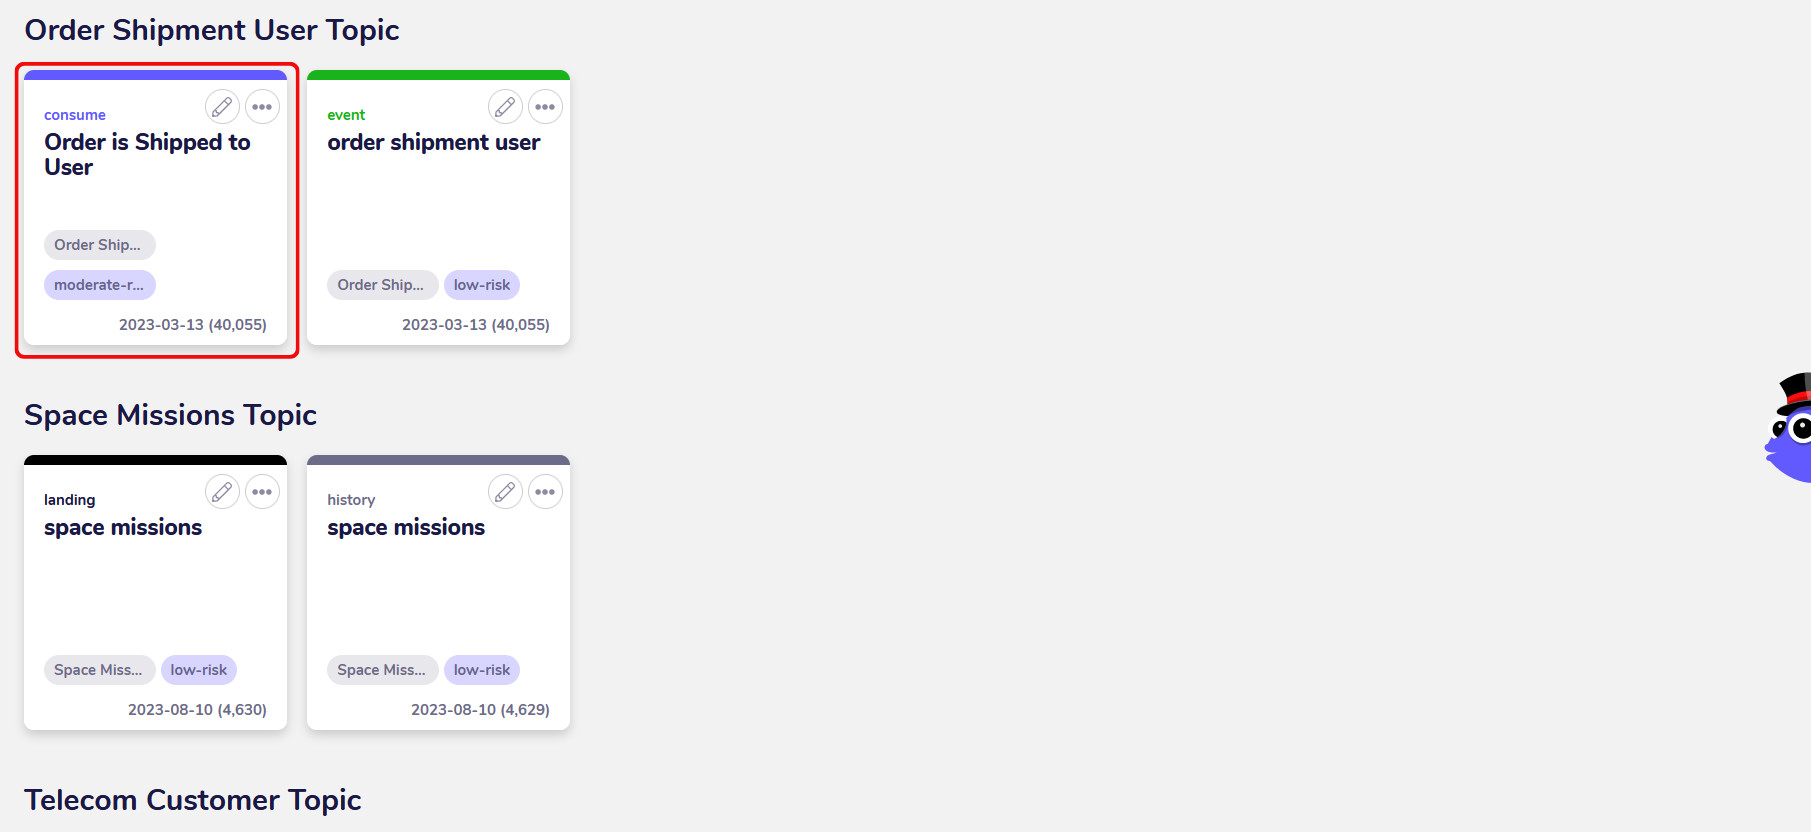
To get started, go to the Catalog in the AgileData App and select any Consume Tile whose fields you would like to rename.
For this guide, we’re going to work with the Consume Tile “Order Is Shipped To User” which contains data on events during e-commerce sales.
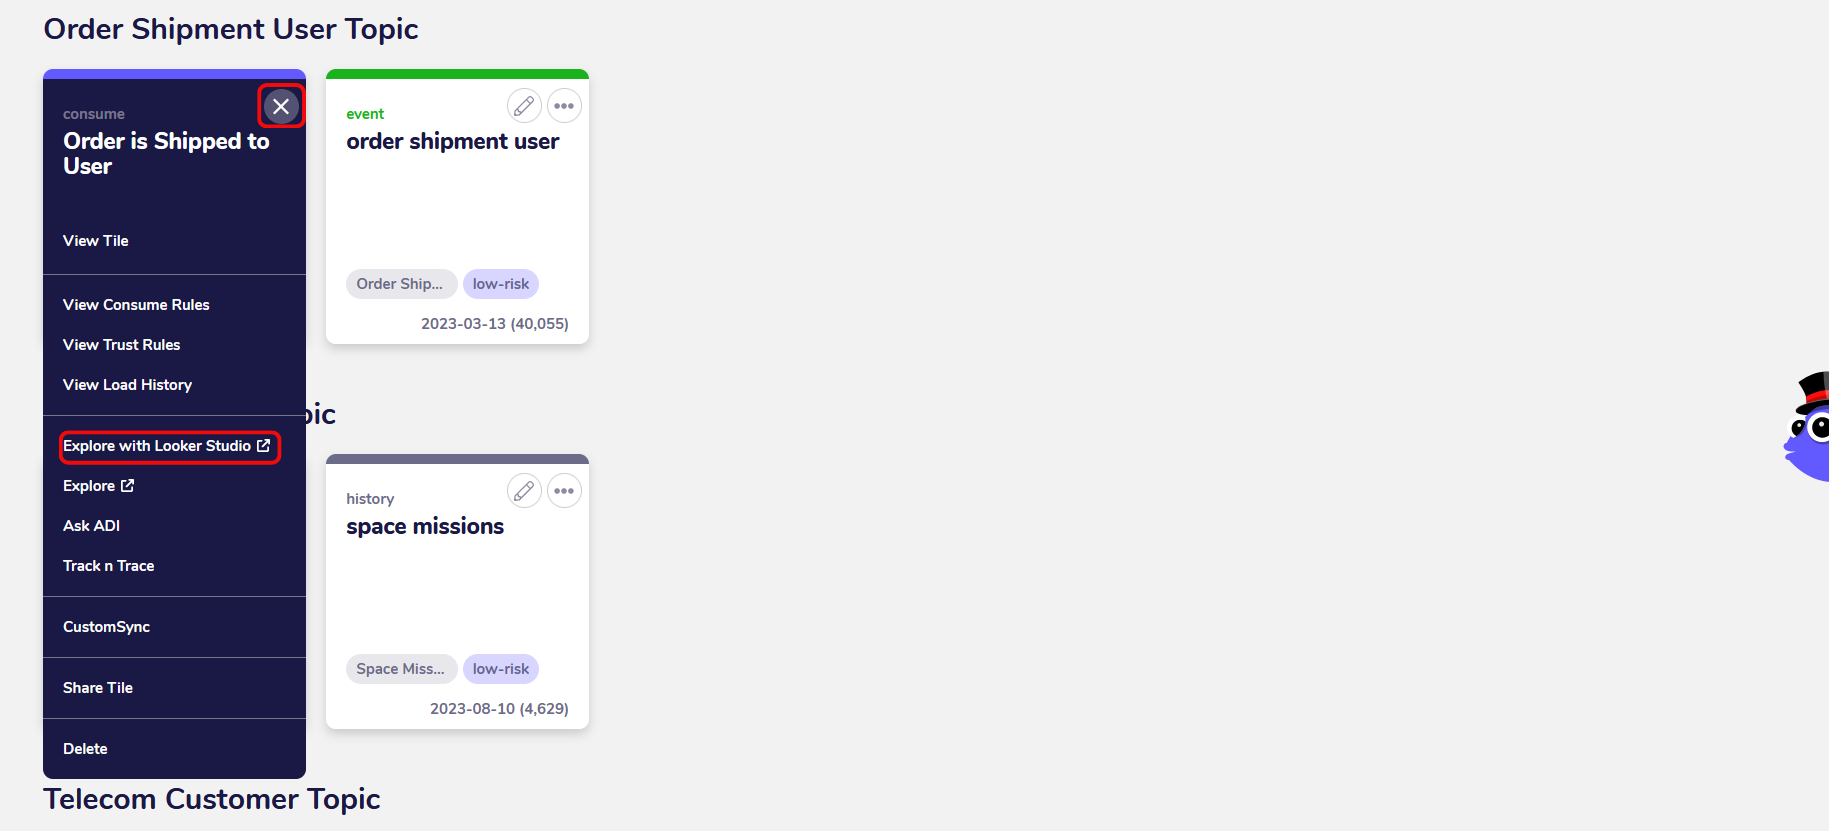
Open the tile detail menu by clicking on the three dots in the top right corner of the Consume Tile. Select “Explore with Looker Studio” to open the data in a Looker Studio report.
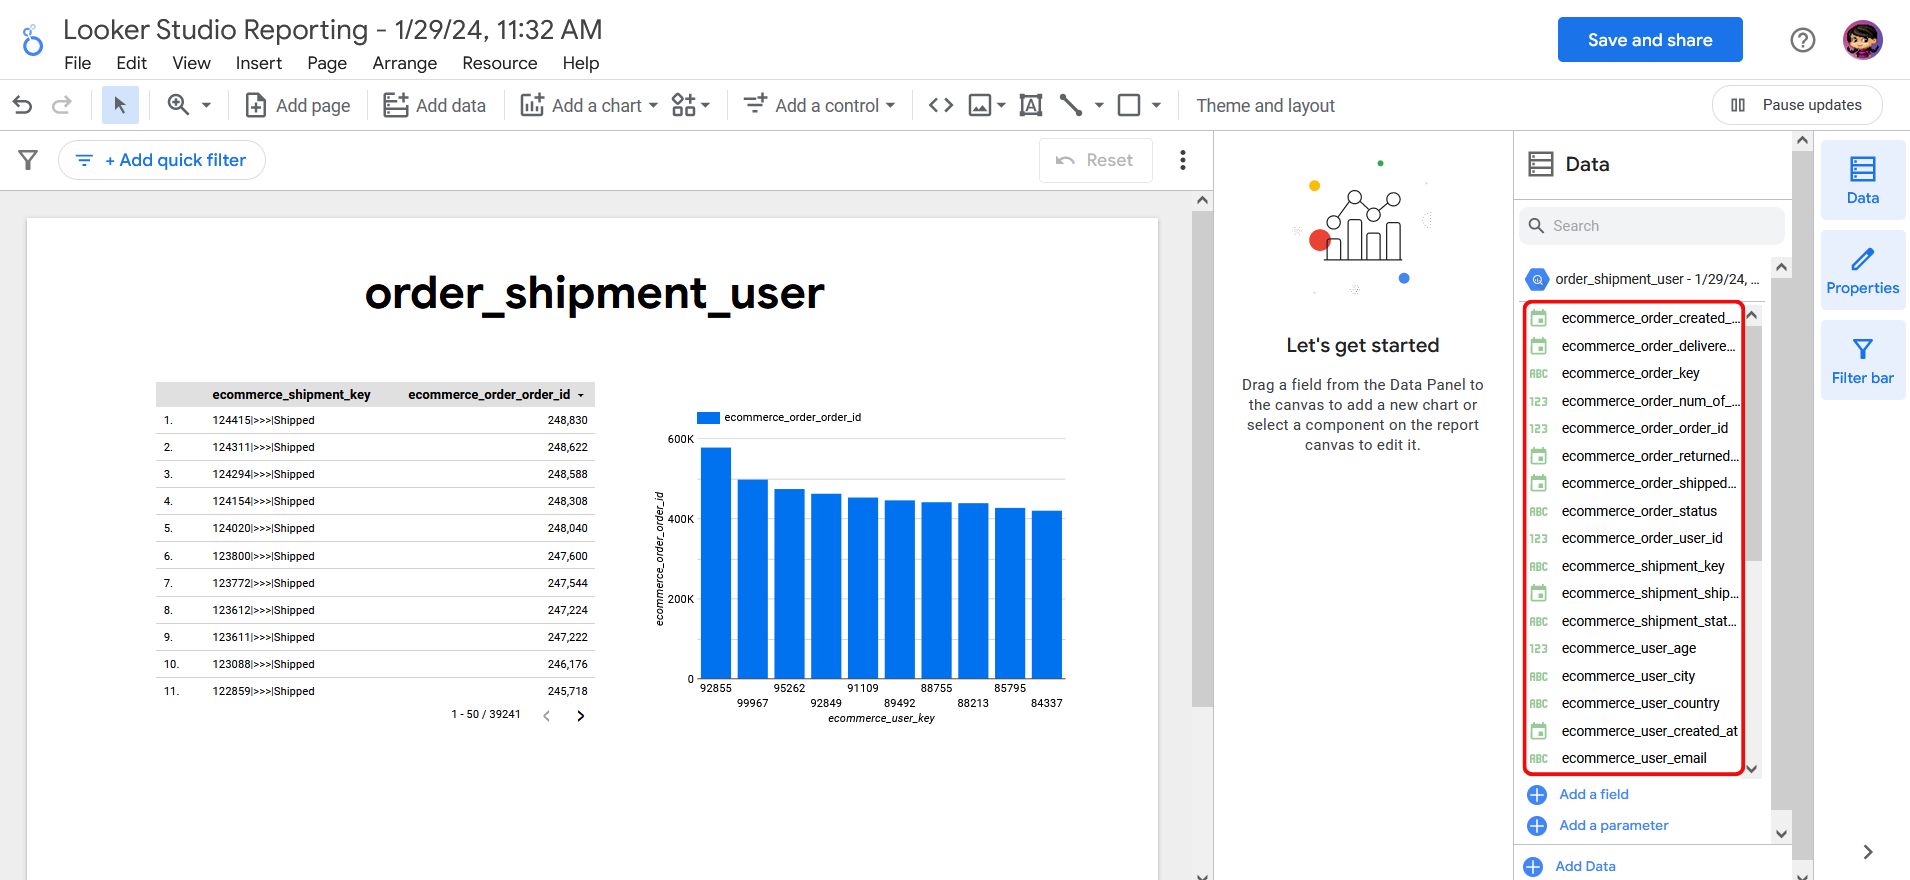
Looker Studio is a popular cloud-based data reporting and data visualization tool by Google that can be accessed directly from within the AgileData App.
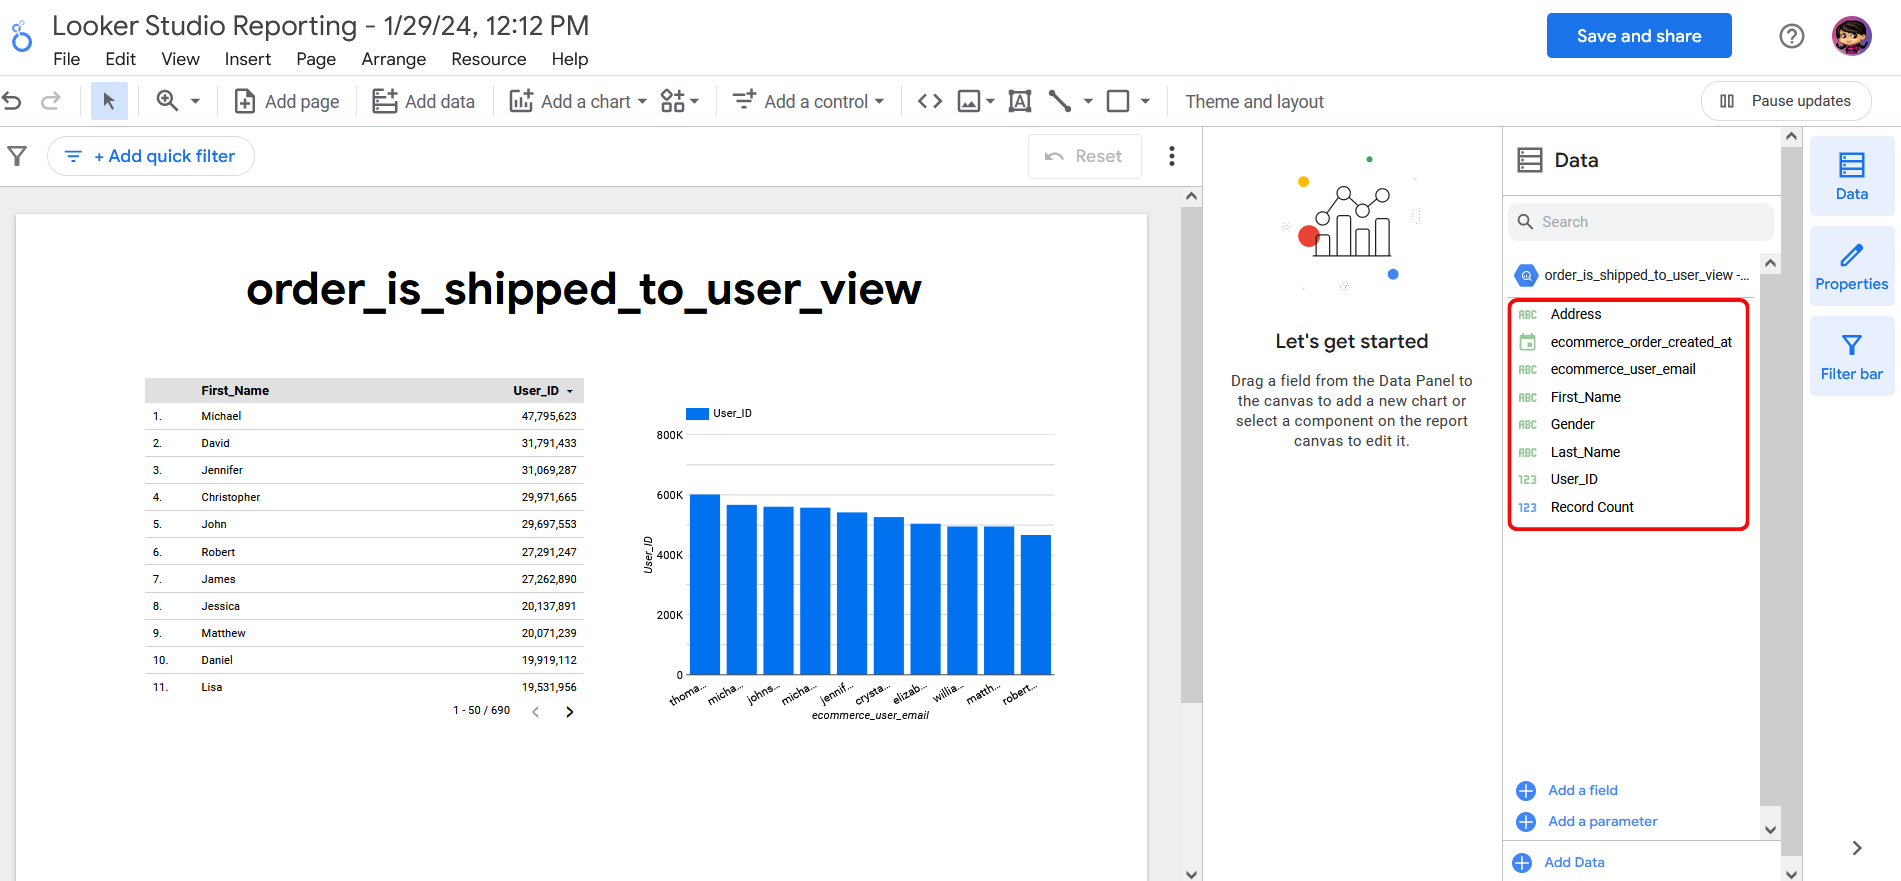
Looker Studio can load data from Consume Tiles in the Catalog and display it in a new report with a sample visualisation. By doing so, it uses the names of the fields from the Consume Tile, which you can view in the report on the right side.
Since these field names are usually autogenerated, they can be long and cumbersome to work with or just generally don’t adhere to naming standards in your organisation. By renaming these Consume Fields you can make your data easier to use in Looker Studio and other last mile reporting tools.
2. Create a new Consume Rule for your Consume Tile
To rename the fields in your Consume Tile, you create a new Consume Rule which is going to do the renaming work for you.
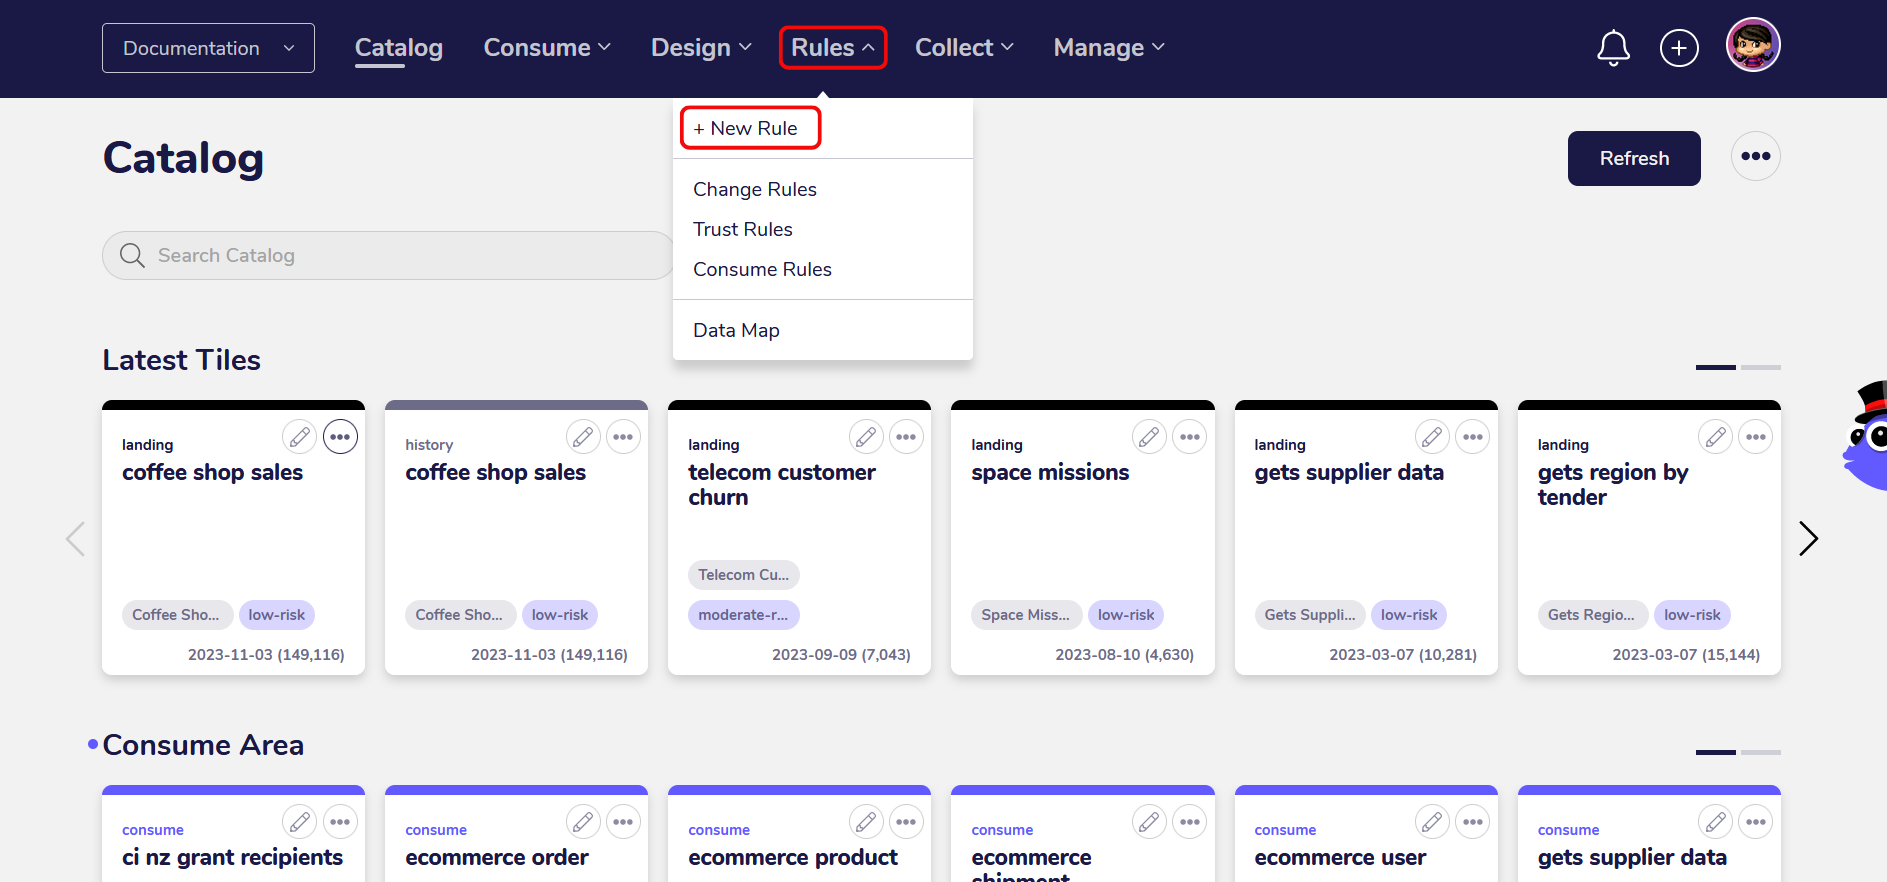
Click on the “Rules” menu and select the “New Rule” option. This opens a screen with an empty rule template.
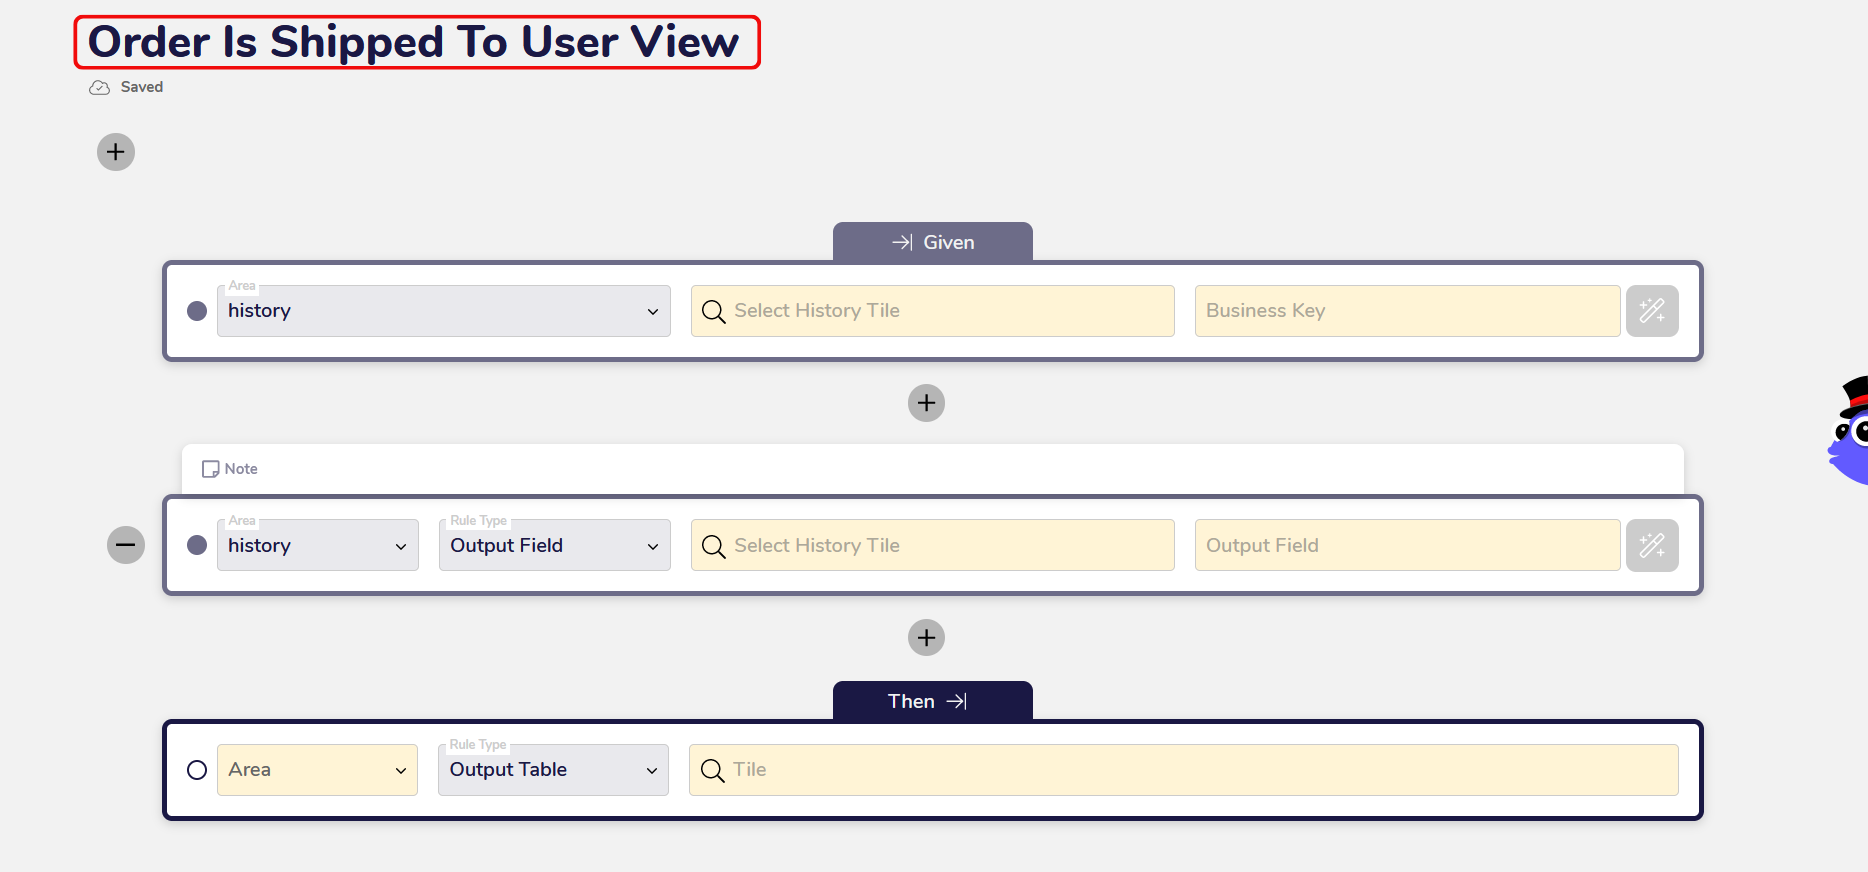
For this guide, we’re going to create a new rule called “Order Is Shipped To User View”.
The purpose of the rule is to create a new Consume View for the Consume Tile “Order Is Shipped To User”.
A Consume View is layered on top of the previous tile and enables us to, for example, rename fields or create a field selection to be displayed in Looker Studio, or any other last mile reporting tool.
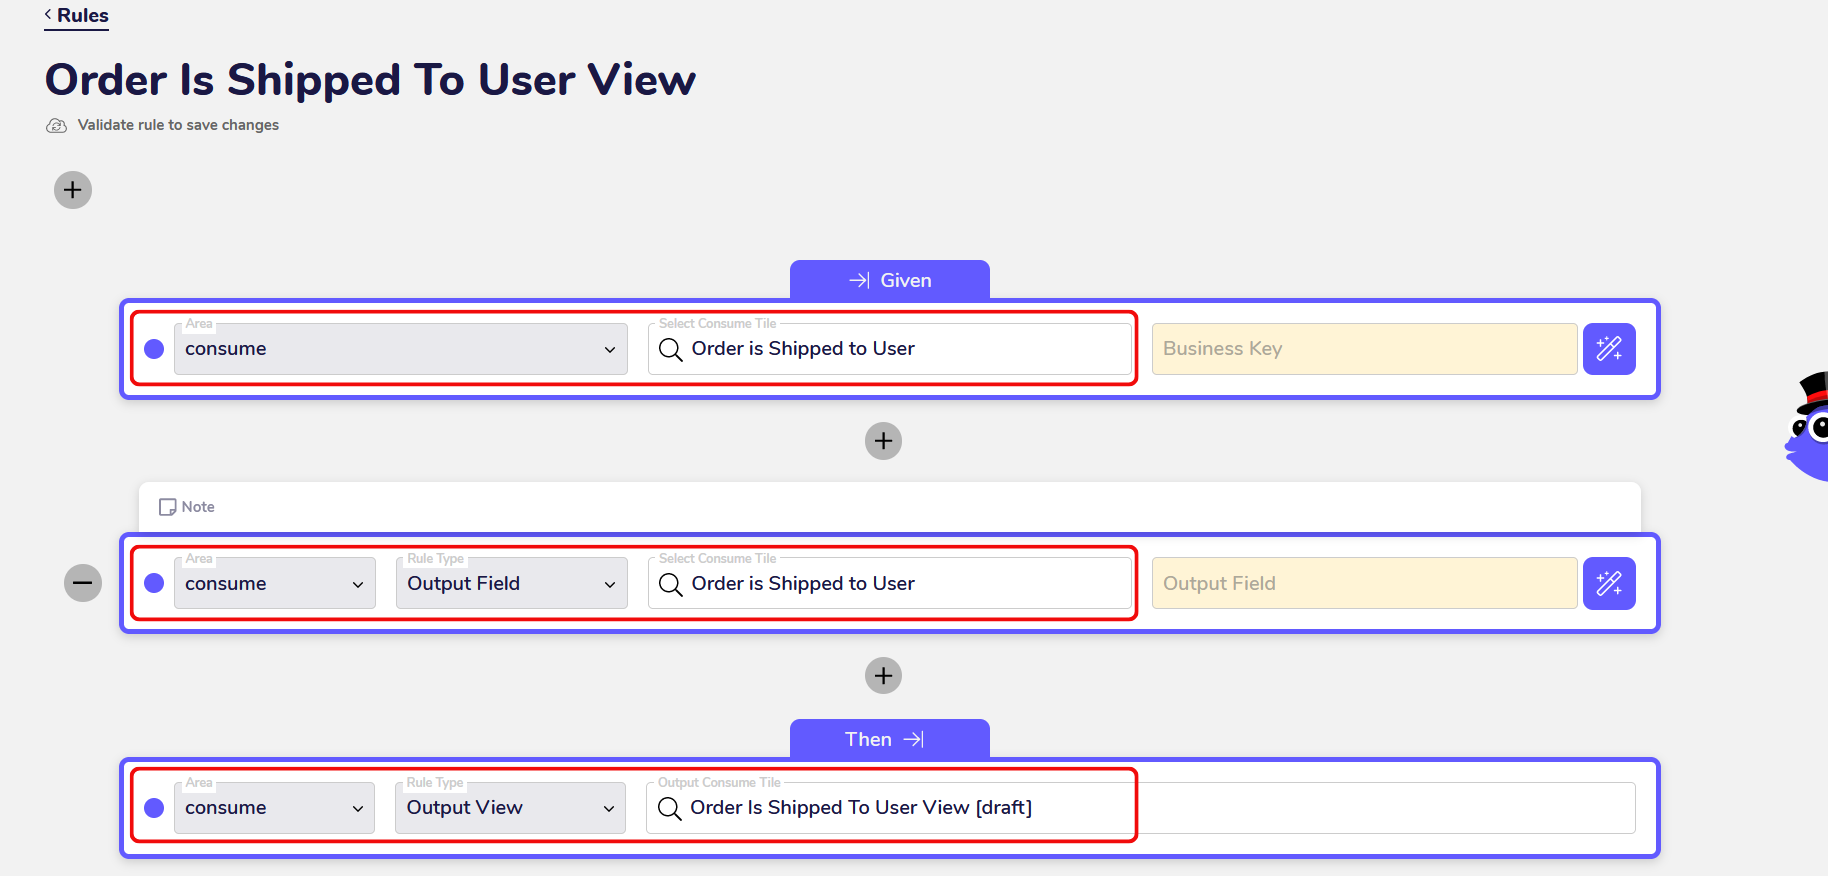
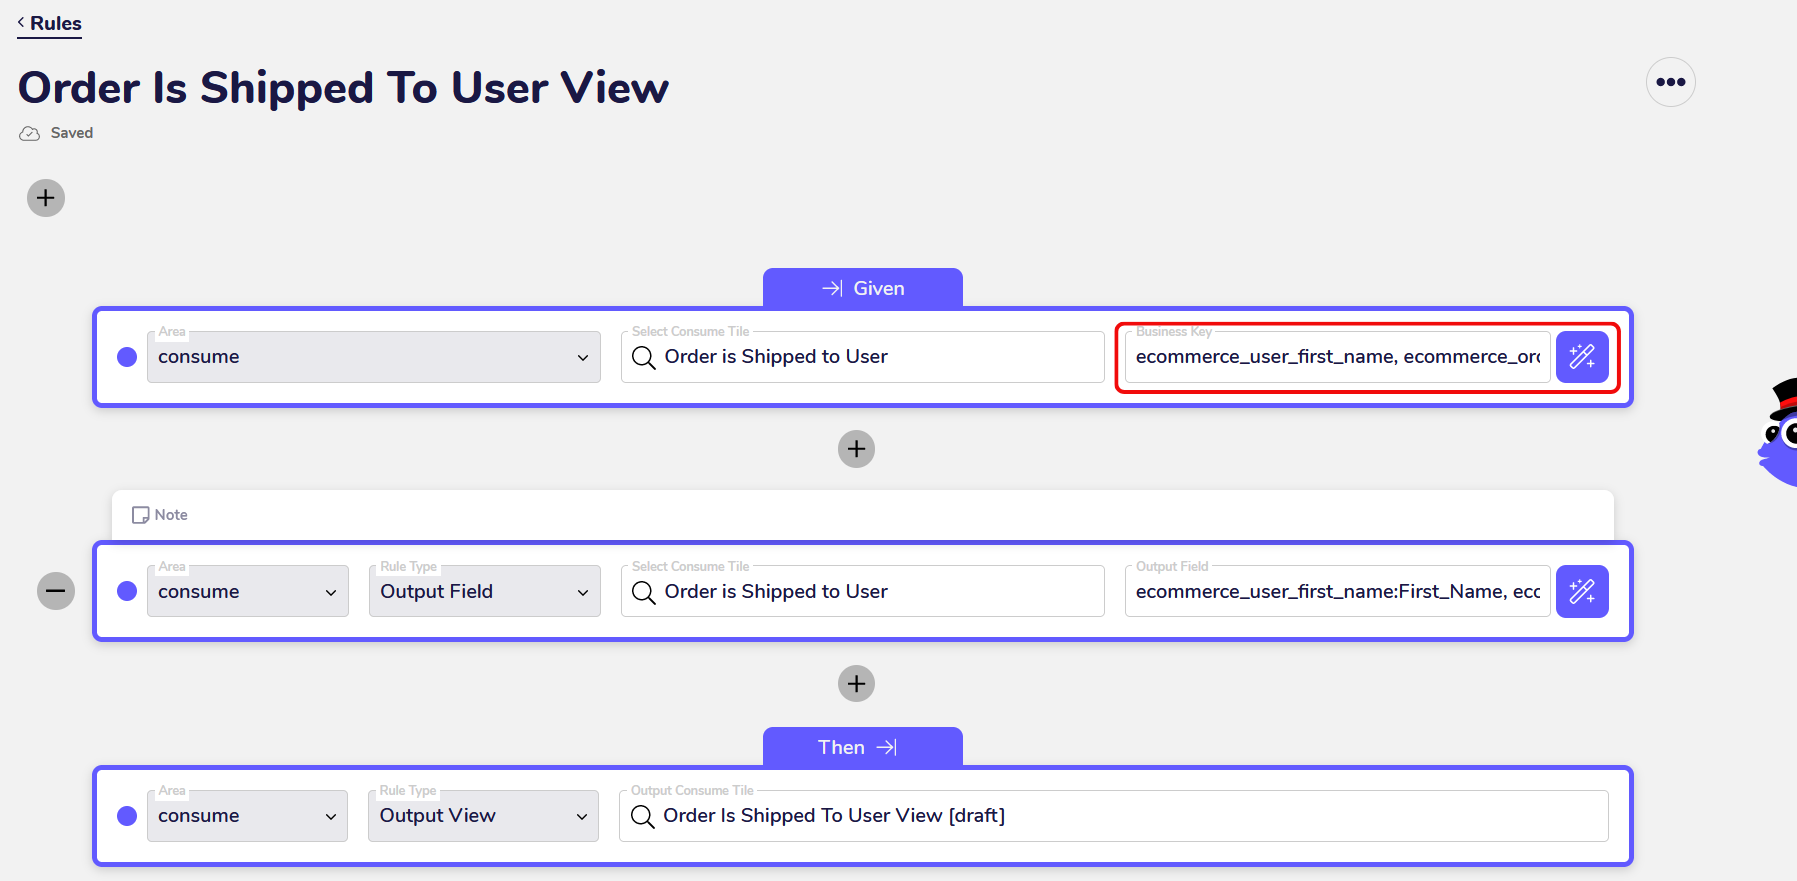
In the first row of the rule, select “Consume” as Area and “Order Is Shipped To User” as Consume Tile.
In the second row, select “Consume” as Area, “Output Field” as Rule Type and “Order Is Shipped To User” as Consume Tile.
In this Rule Step we’re going to rename the fields.
In the third row, select “Consume” as Area, “Output View” as Rule Type and create a new tile named “Order Is Shipped To User View” as Output Consume Tile. This part effectively creates the new Consume View with the renamed fields.
To select which Consume Fields you want to include in the Output Consume View, click on the purple magic wand icon in the second row, to open the Rule Step Wizard.

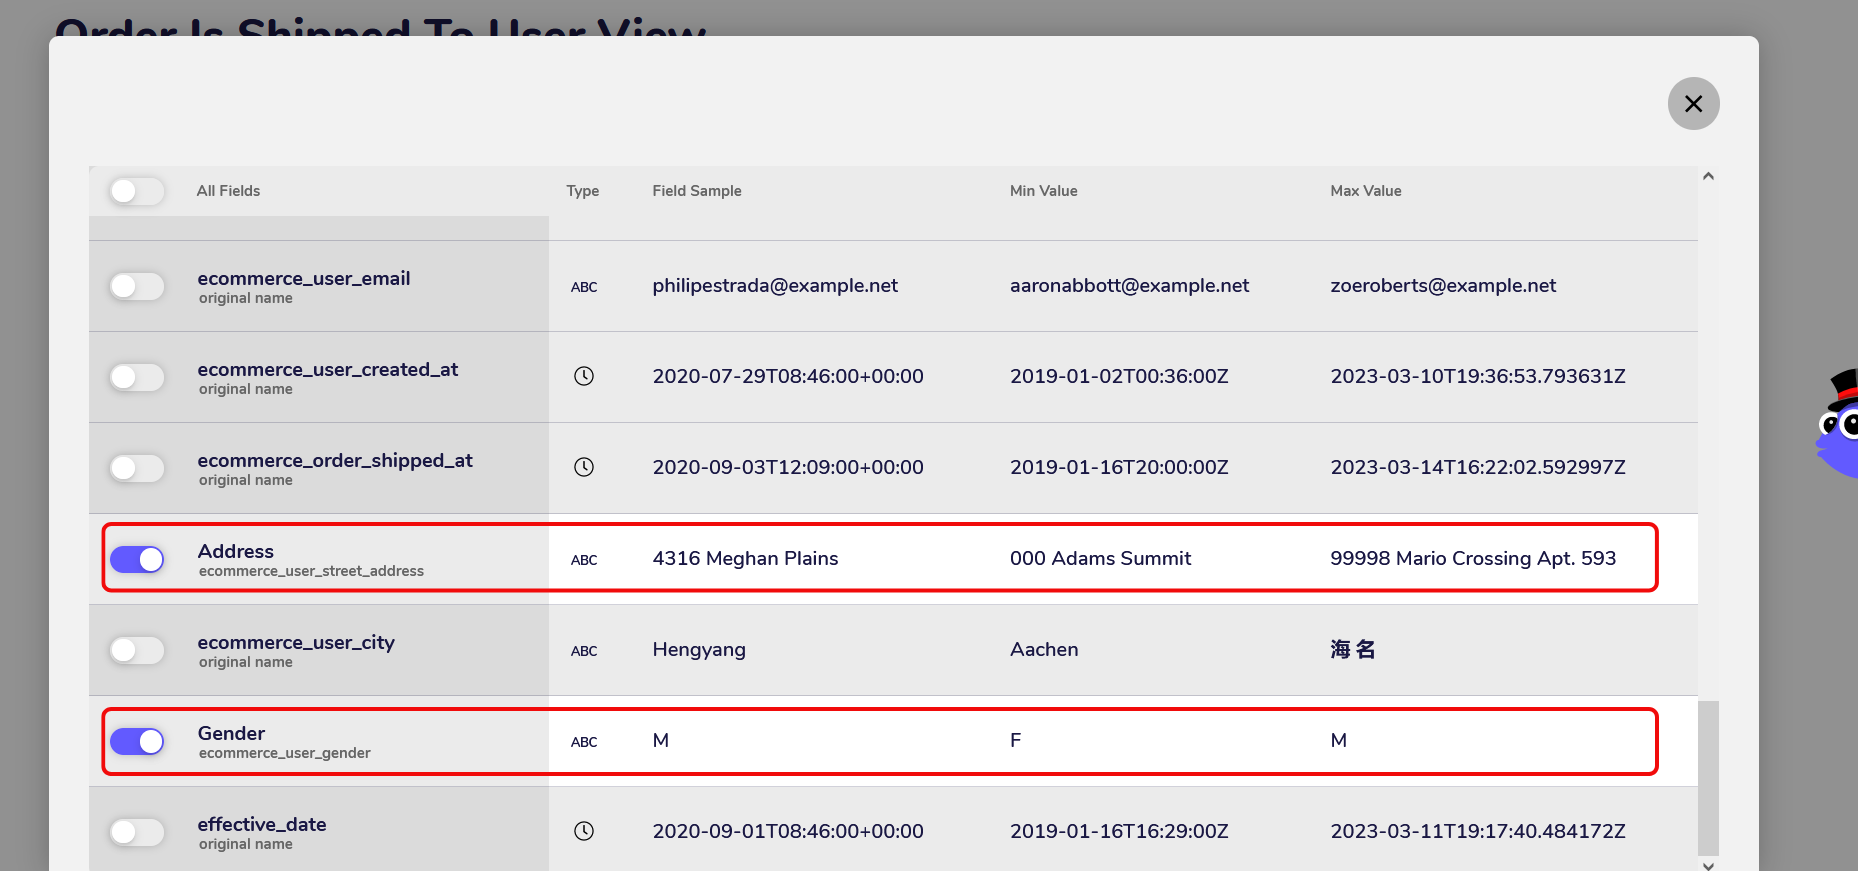
This opens a wizard displaying all available fields in the Consume Tile and some basic information about them for example their name, their data type, a sample value and their minimum and maximum values.

Click on the activation toggle at the left side of a row to include a field in this Consume View.
If you want to rename the field, click on the name and enter a new one.
Under the new name you can still see the old name displayed at the bottom. For our example, we’re going to include the fields “ecommerce_user_gender” and “ecommerce_user_street_address” and rename them to Gender and Address.
You can also include fields without renaming them by simply activating the toggle on the left.
Close the wizard, if you’re finished with selecting and renaming the fields. You can view your selection in the “Output Field” section of the rule.
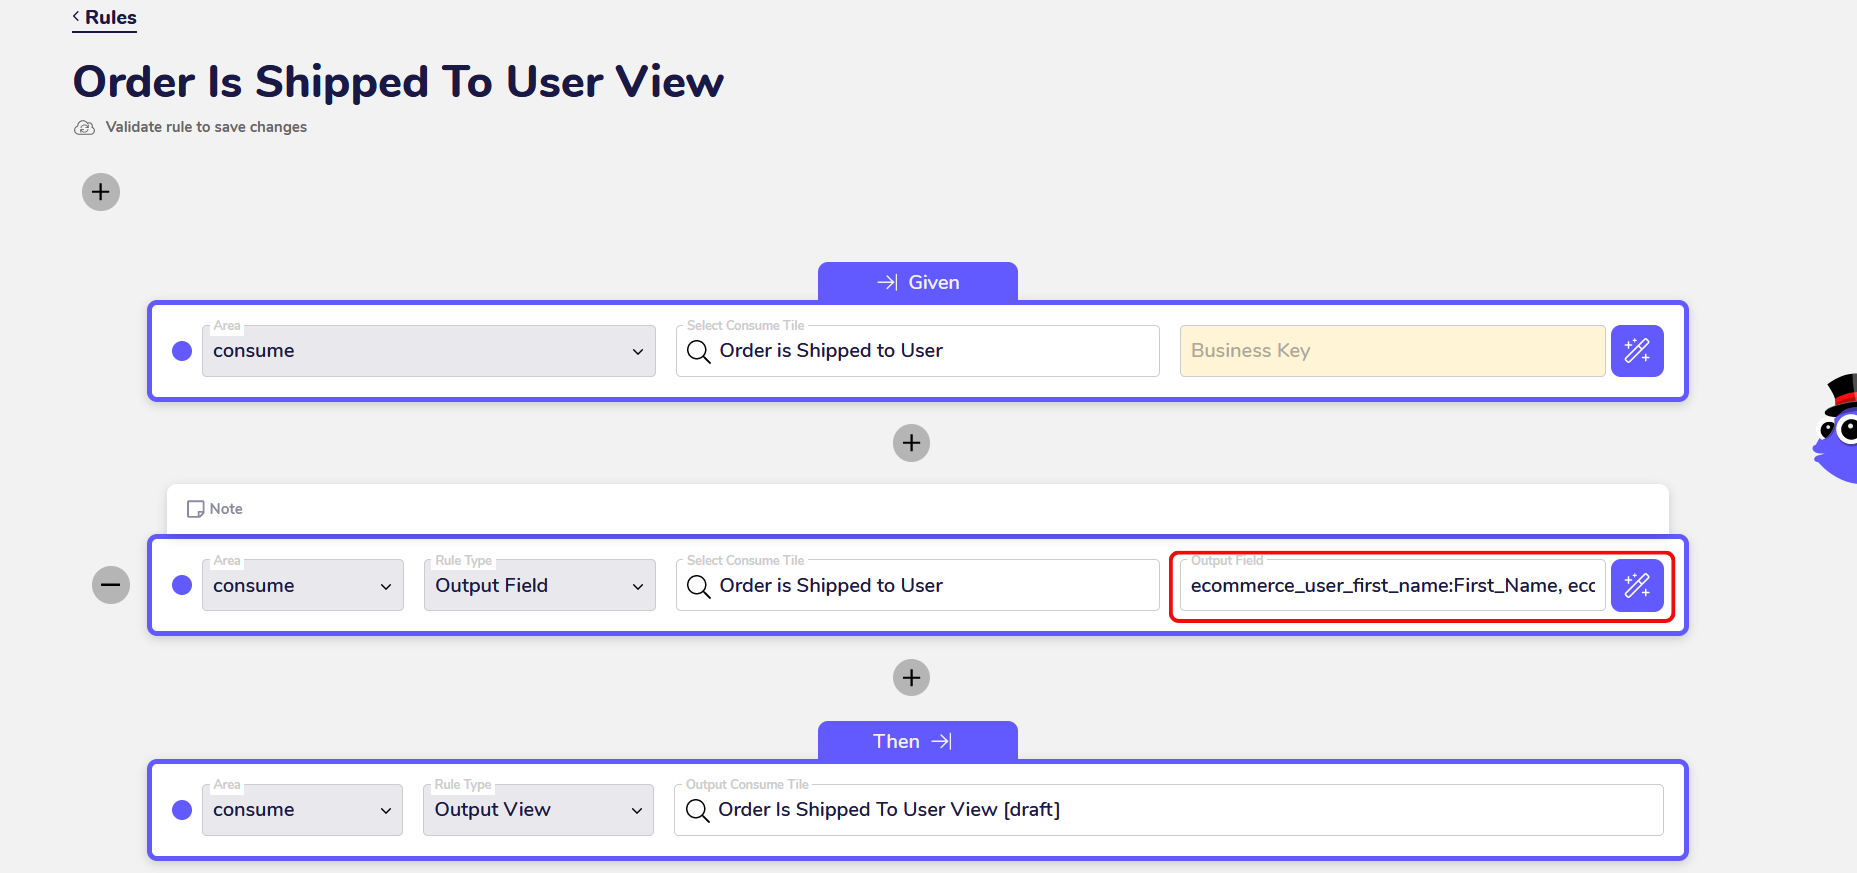
To finish the rule configuration, select the same fields you have selected under “Output Field” in the “Business Key” section of the first row.
3. Validate and Publish the new Consume Rule
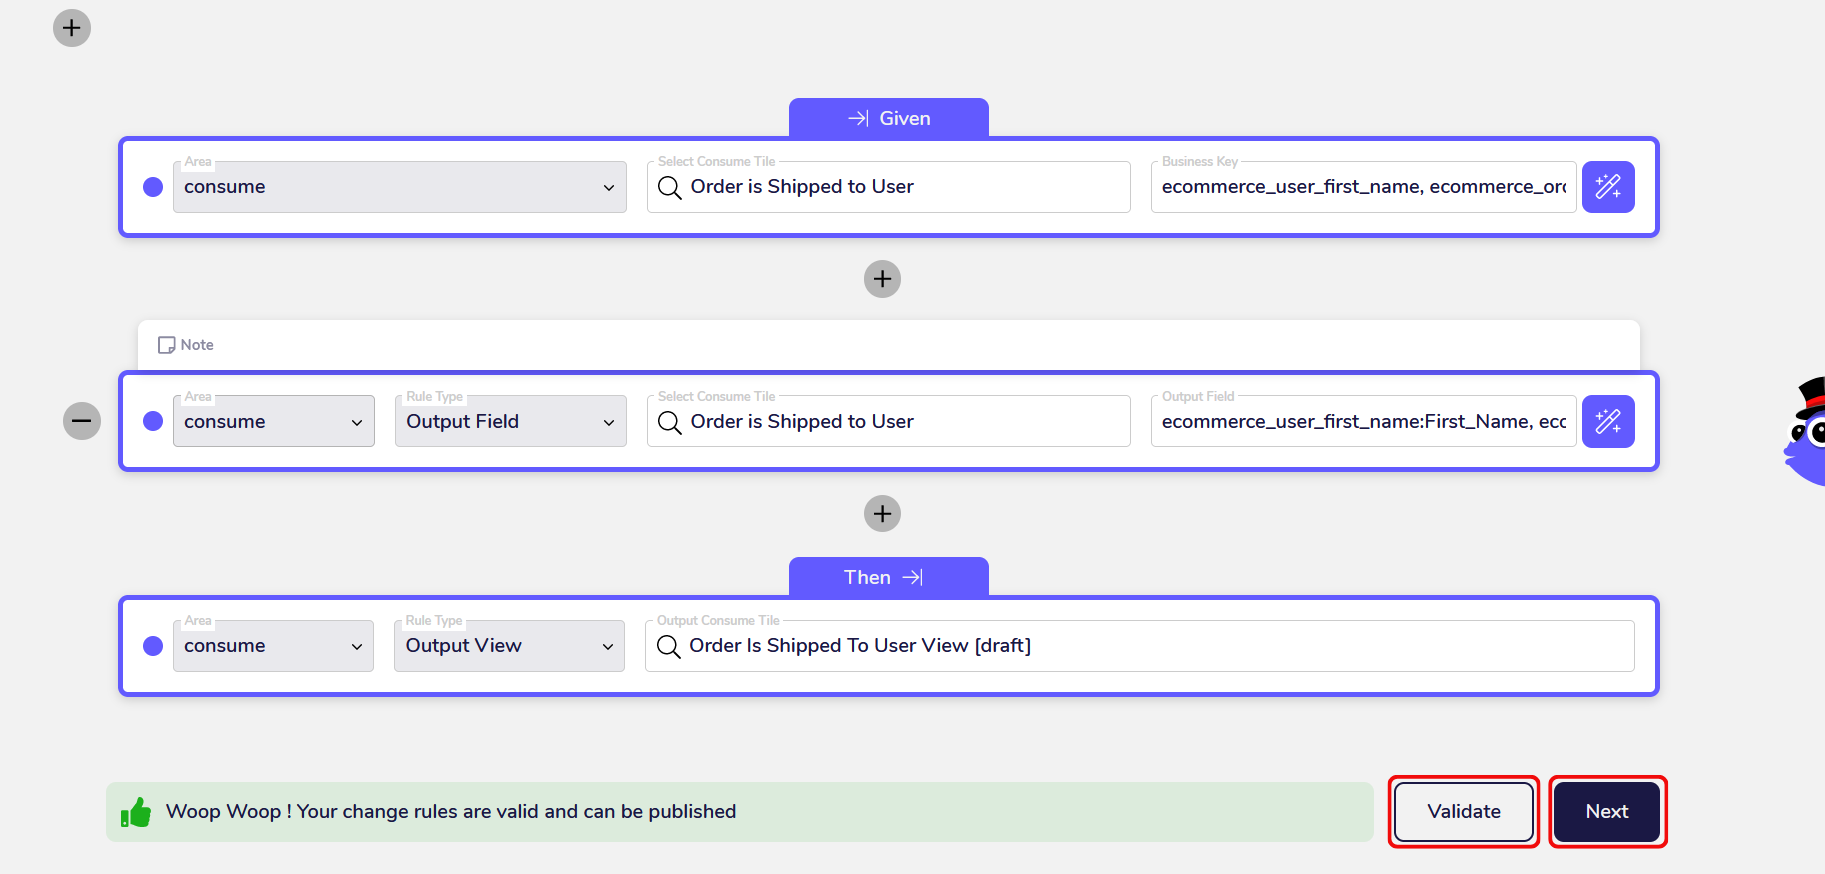
Validate the finished Consume Rule by clicking on “Validate” at the bottom and address any issues you might encounter while the AgileData App checks the rule for validity.
If the rule is valid, click on “Next”.
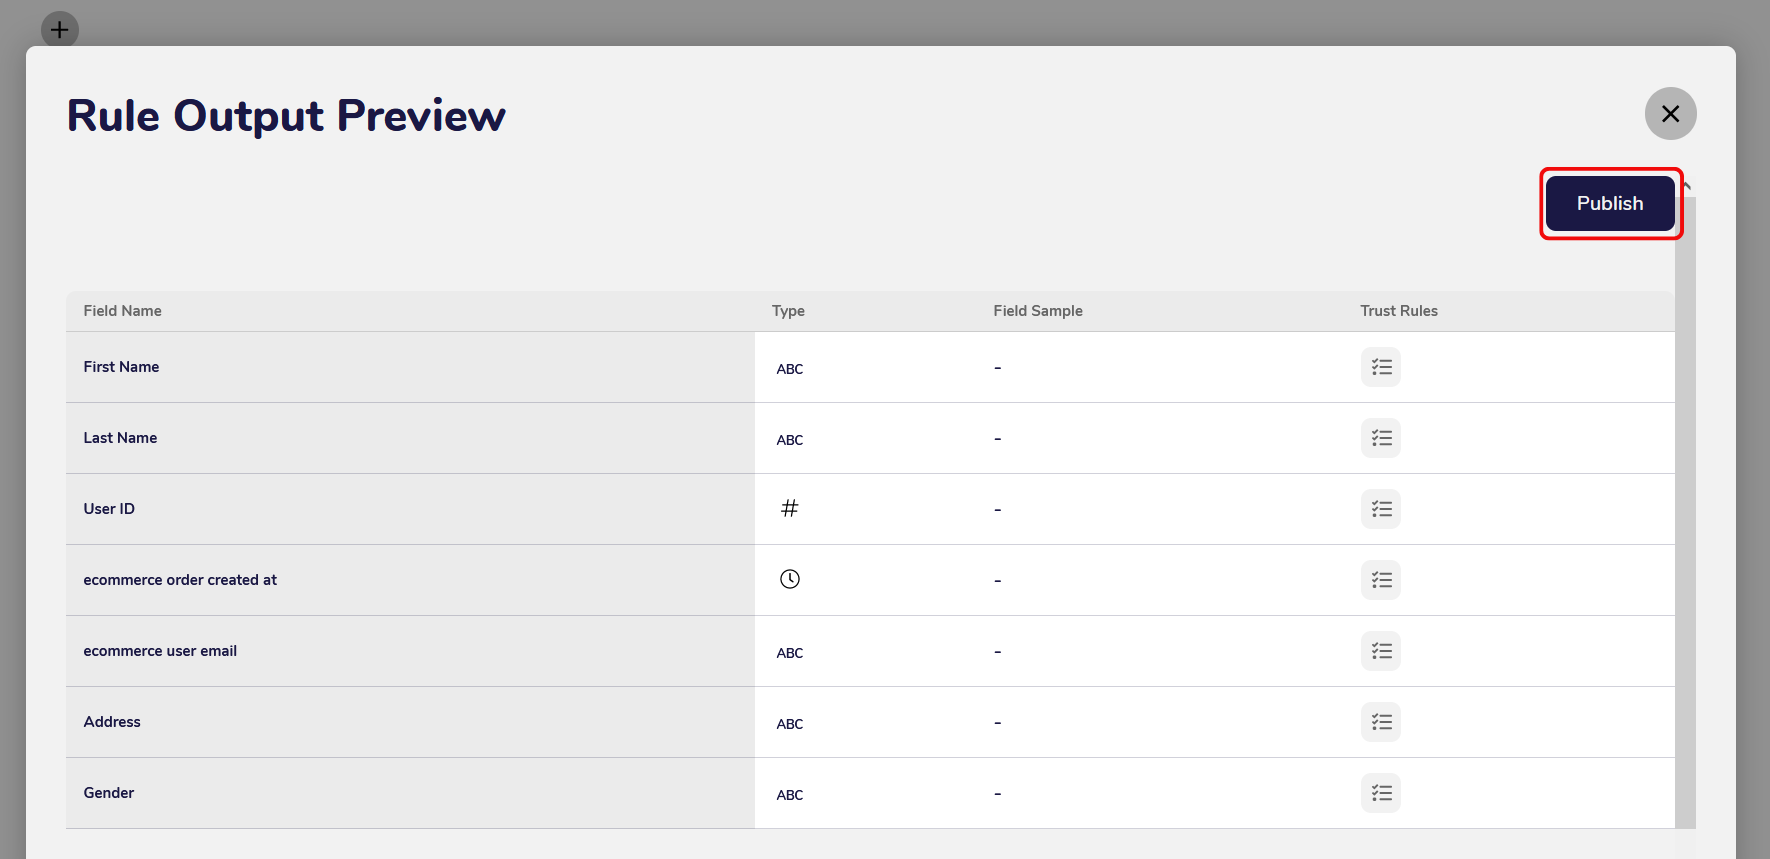
A modal screen will be opened, letting you preview the rule output.
Here you can see the selected and renamed fields which will be included in the new Consume View.
If you’re satisfied, click on “Publish” to publish the rule.
4. Check the Data Map for the new Consume View
You can see the new Consume View in the Data Map section of your AgileData Tenancy.
The Data Map provides an overview displaying all tiles in your instance as circles and the rules connecting them as lines between the circles.
In the Data Map, you can see how the tiles are feeding data into each other, for example, which Consume Tiles are feeding data into Consume Views.
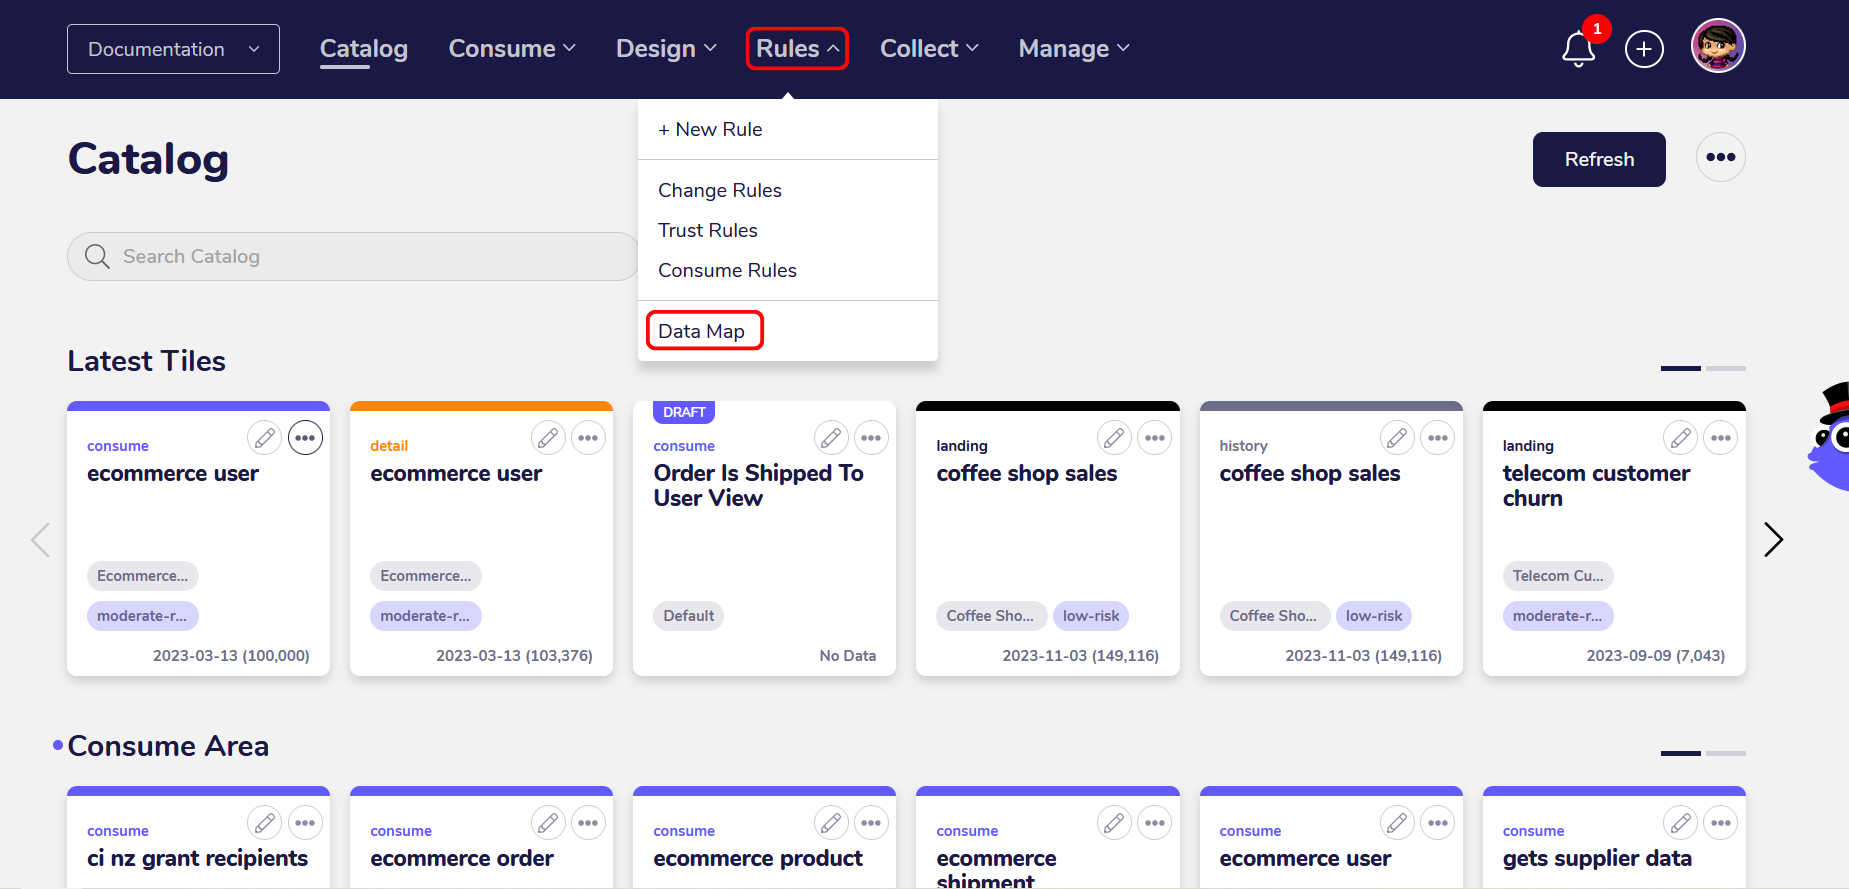
You can open the Data Map by clicking on the “Rules” menu and selecting the “Data Map” option.
The new Consume View “Order Is Shipped To User View” is displayed at the right of the overview, being connected to the “Order Is Shipped To User” Consume Tile.
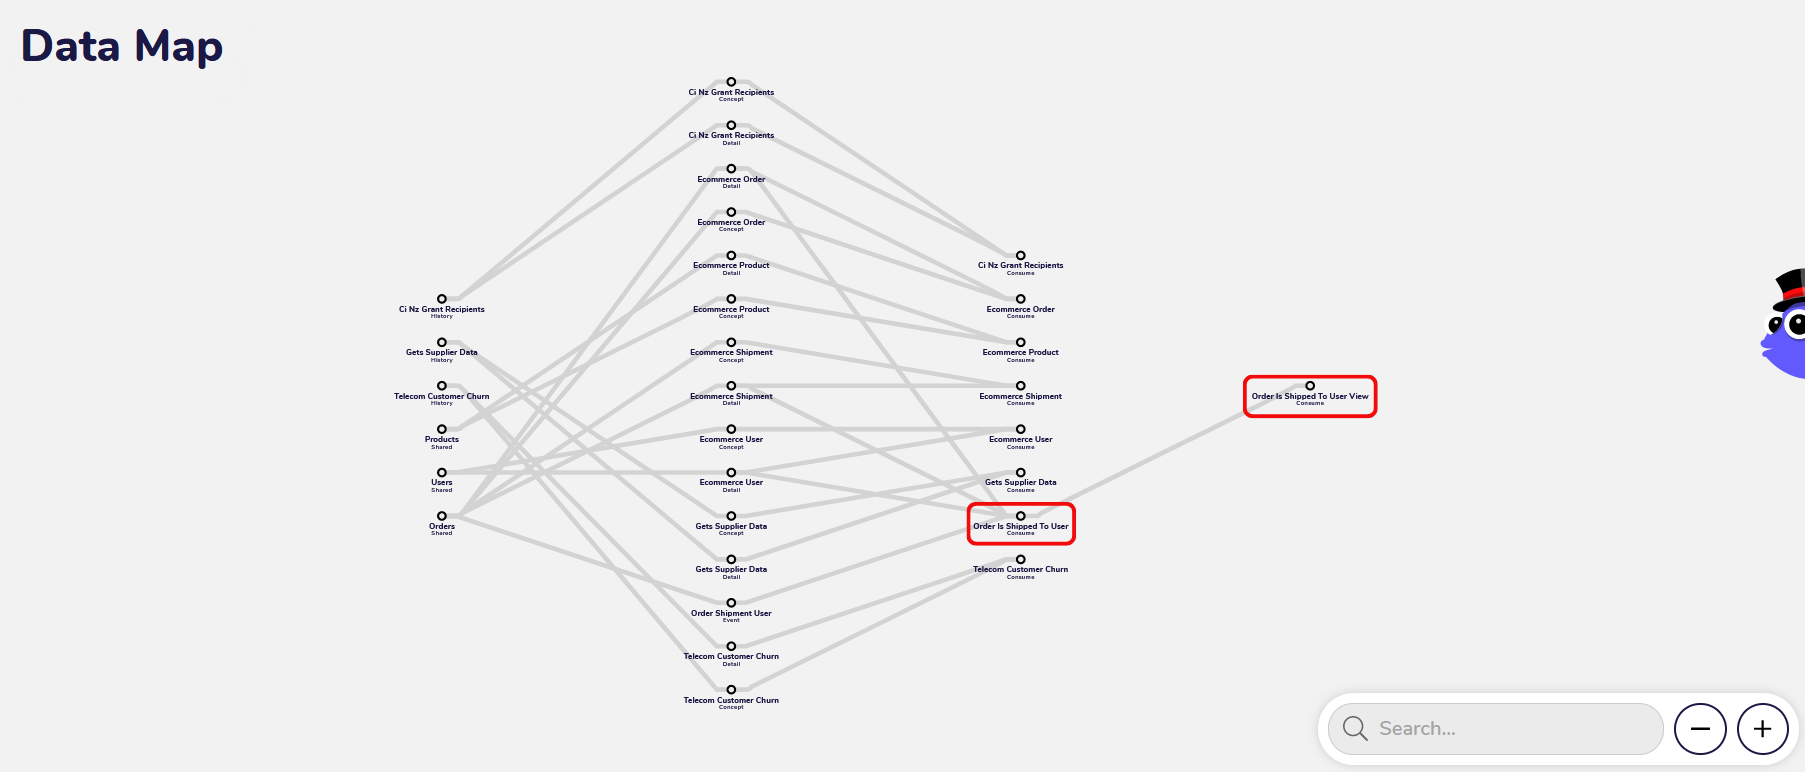
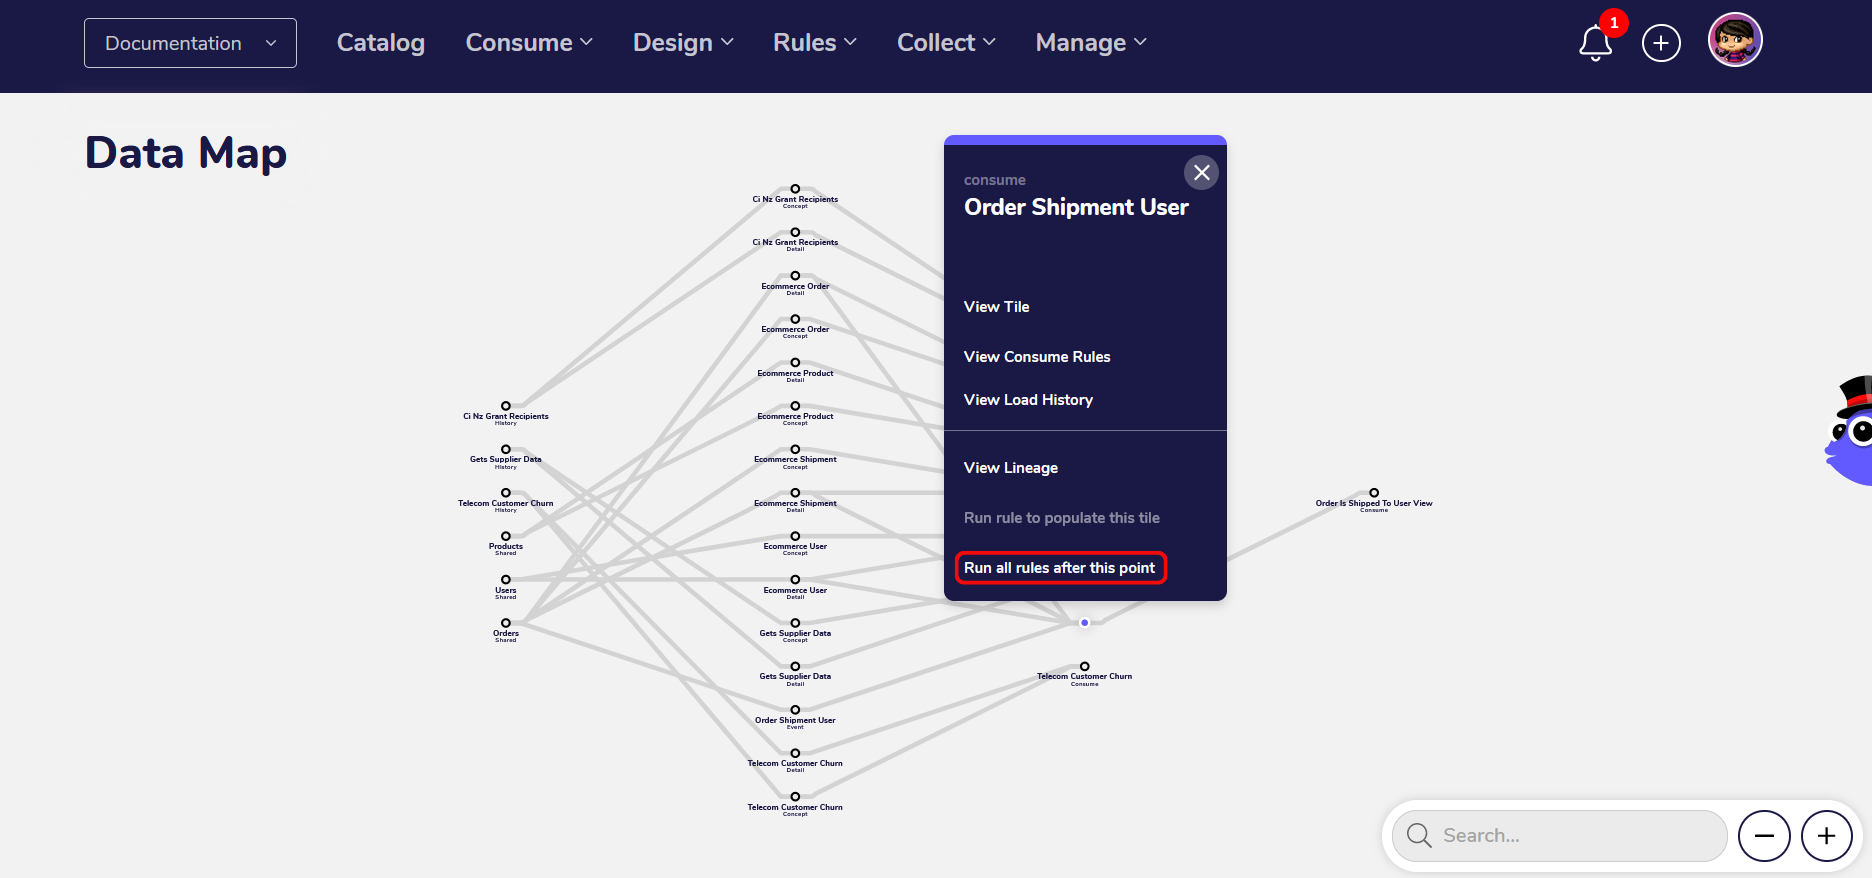
Click on the circle representing the “Order Is Shipped To User” Consume Tile and a detail menu will be opened. Here, you need to select “Run all rules after this point” to run the new rule and successfully create the Consume View.
5. Open Consume View with Looker Studio to see renamed fields
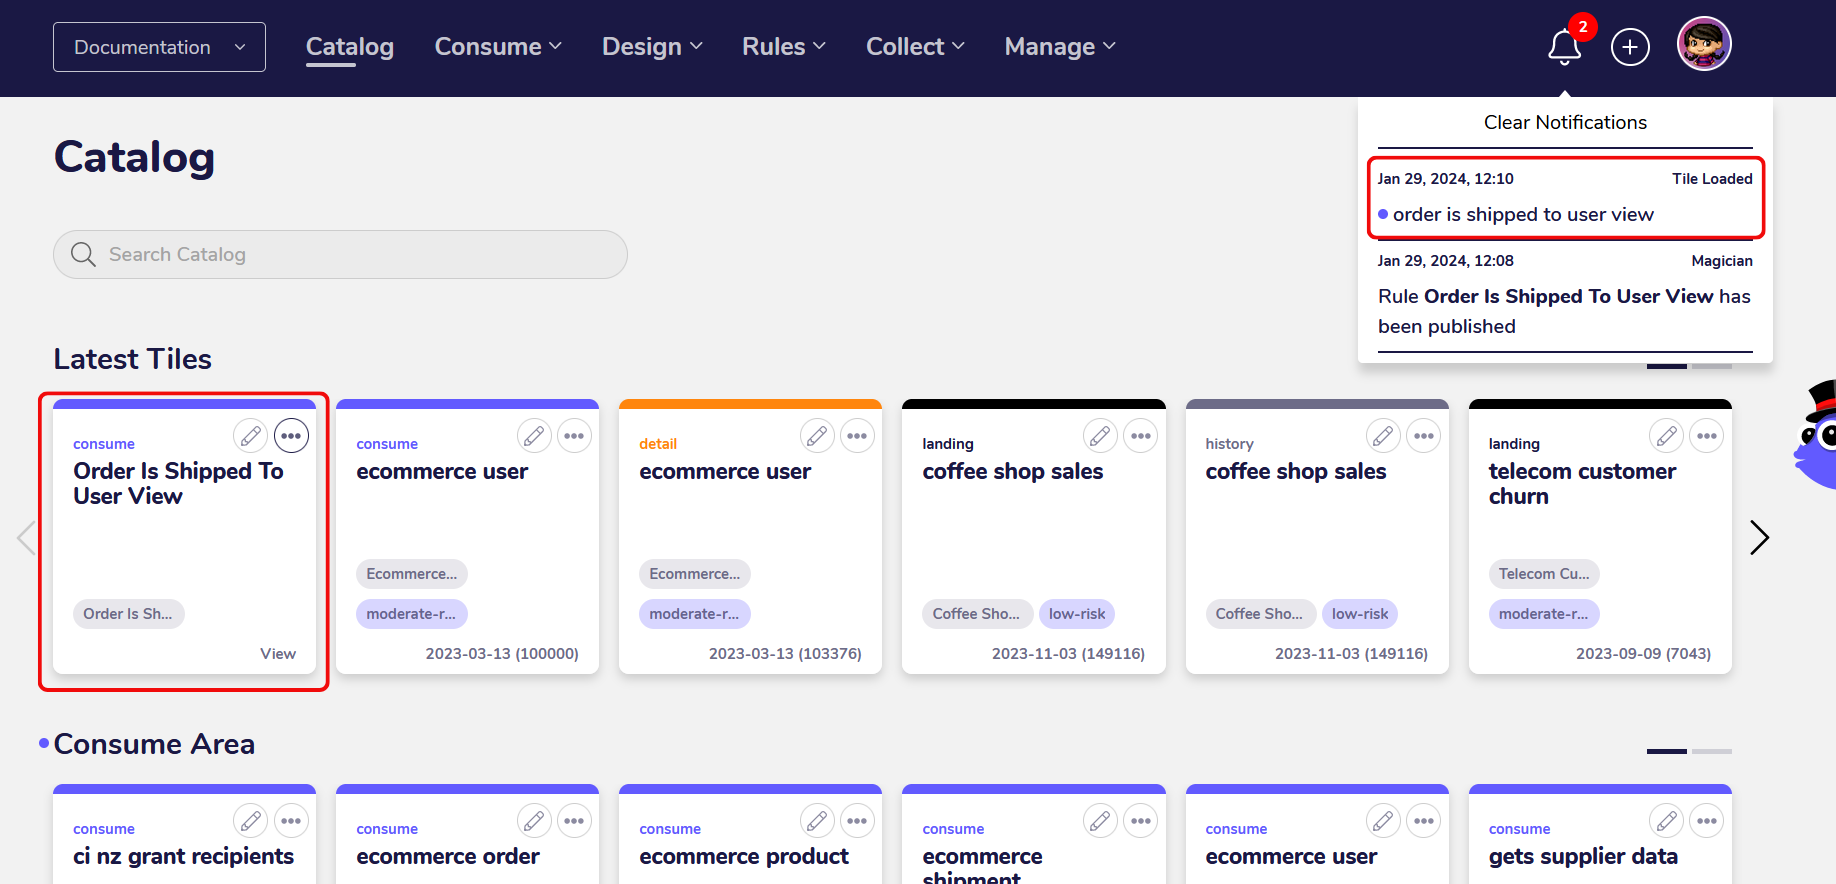
Switch back to the Catalog and you will receive a notification in the top menu when your Consume View has been created.
You can see the Consume View tile among the other Consume Tiles in the Catalog.
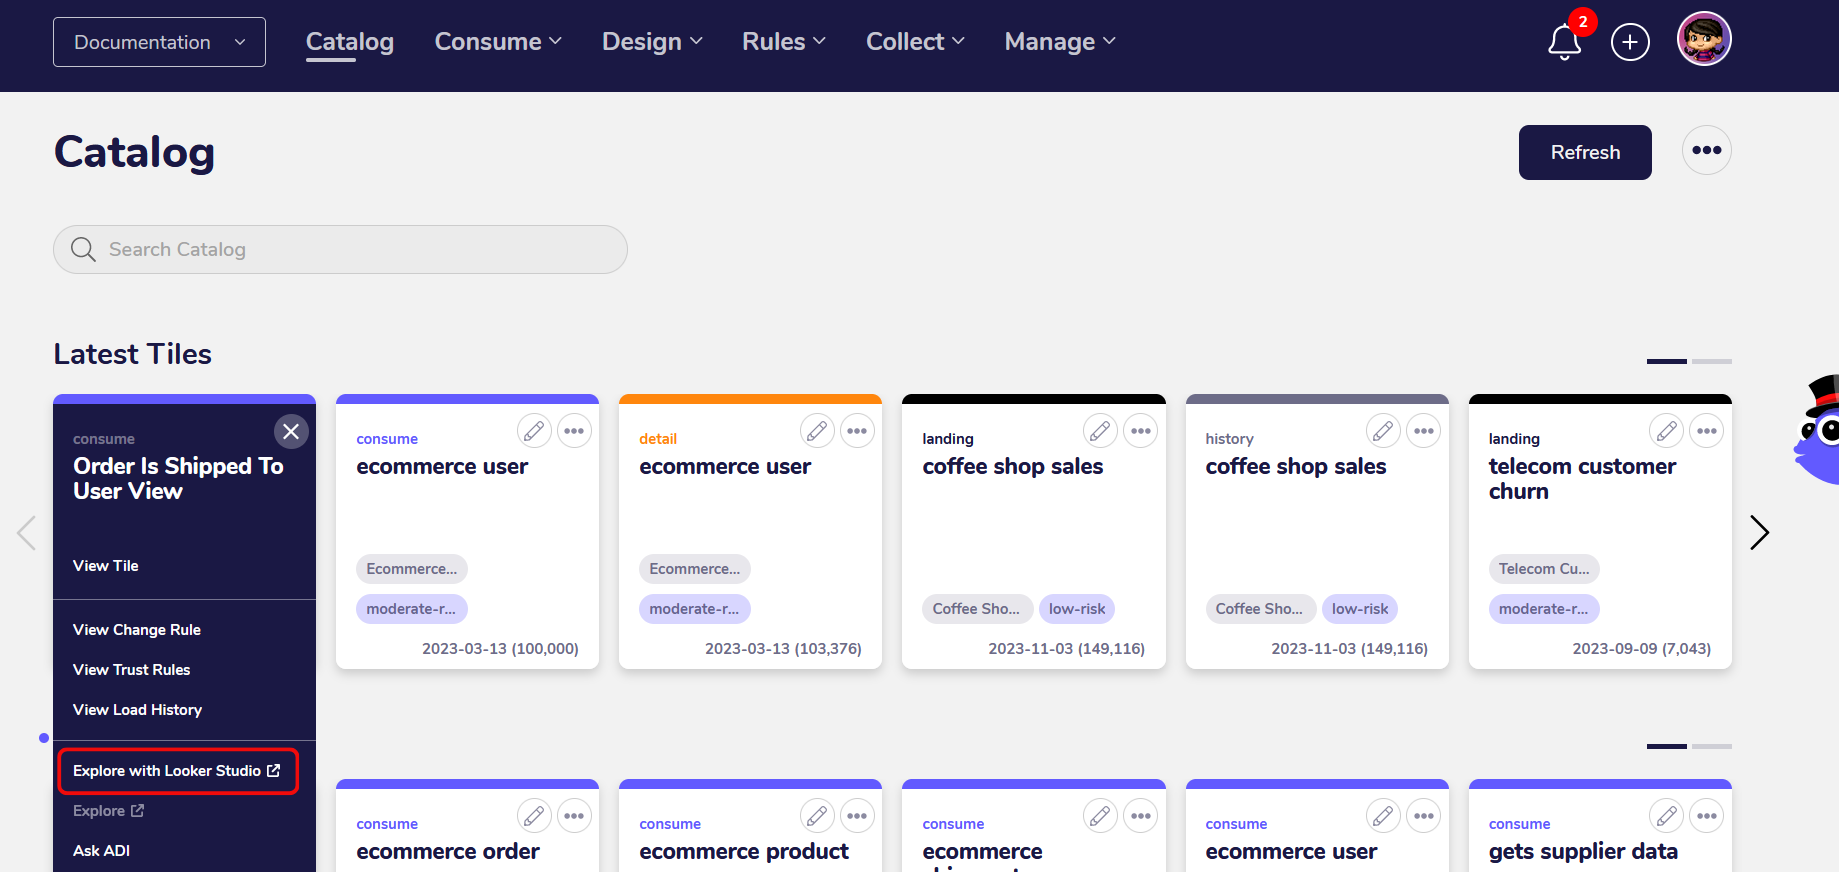
The Consume View can be opened in Looker Studio and other applications like any other Consume Tile in the Catalog. Open the tile with Looker Studio to see the renamed fields.
Now your Looker Studio report only displays the fields you have selected during the rule creation and some of the fields are renamed. All in all, this successfully tidies up your report with your data clearly labeled and lets you create pretty names for your fields.
Optional Steps
1. Check Event Matrix to view composition of Consume Tile
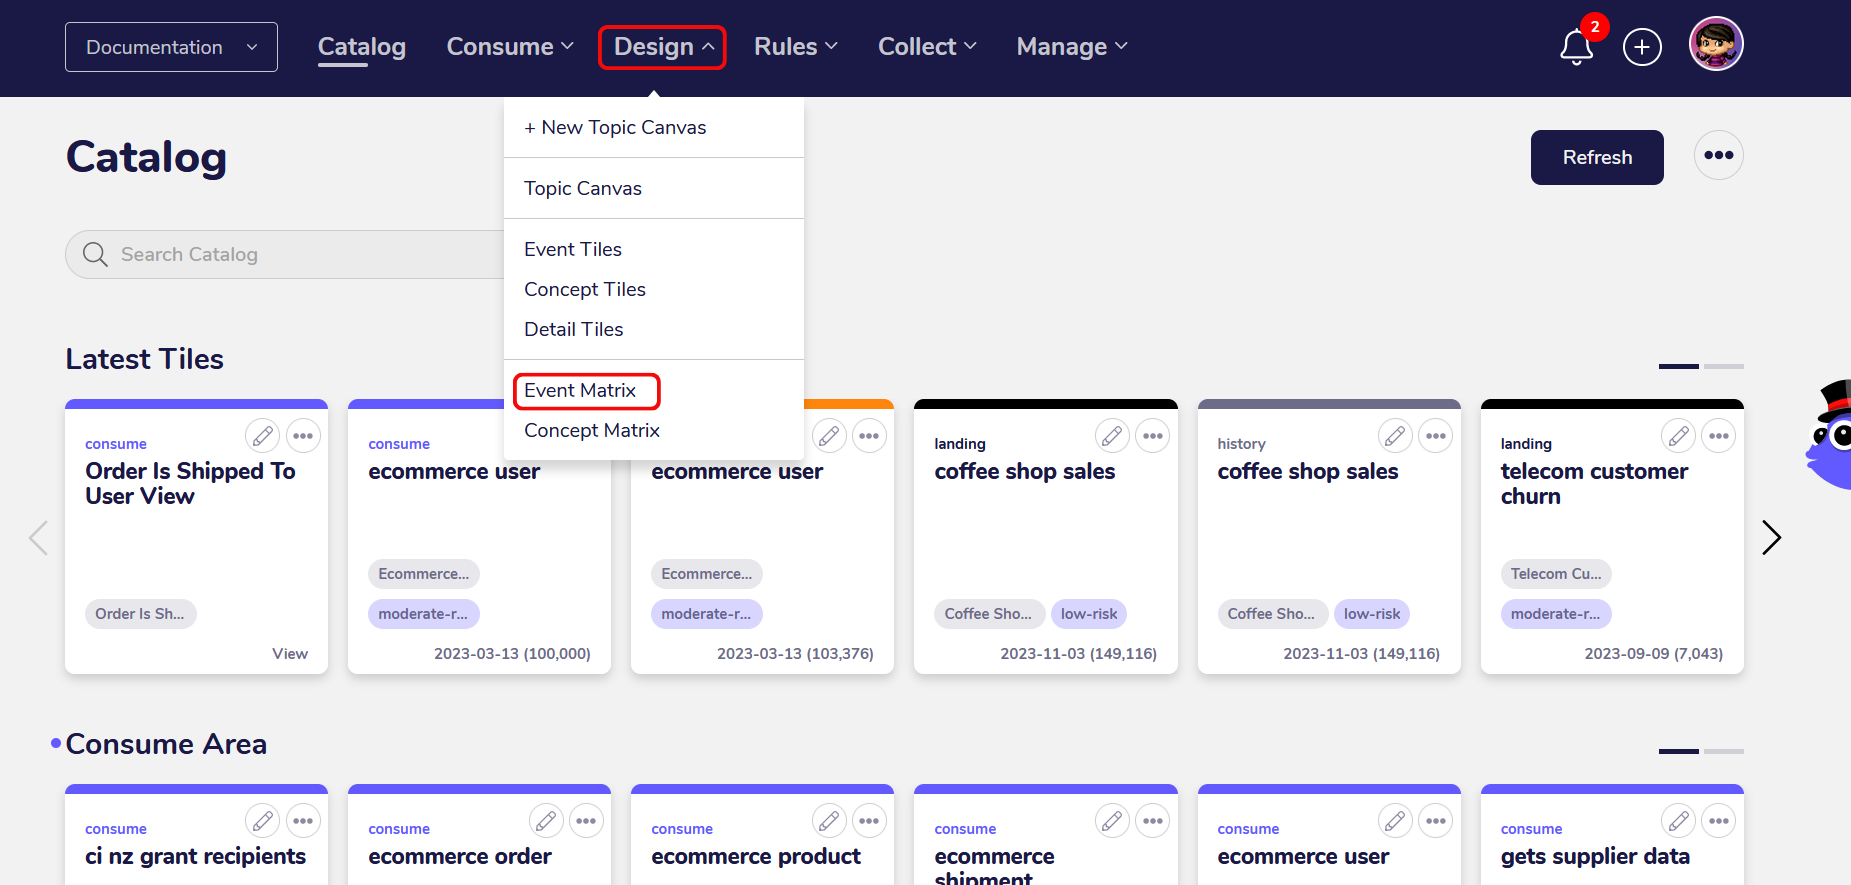
Similarly to the Data Map, the Event Matrix is a screen in your AgileData Tenancy letting you gain an overview of how your tiles are connected. The Event Matrix can be accessed by clicking on the “Design” menu and selecting the “Event Matrix” option.
The Event Matrix provides a visual view in a matrix format showing relations between Event Tiles and Concept Tiles with events displayed as rows and concepts displayed as columns. For example, the event “Order Shipment User”, being represented as the Consume Tile “Order Is Shipped To User”, is composed of the Concept Tiles “Ecommerce Order”, “Ecommerce Shipment” and “Ecommerce User”.
This can help you gain an understanding of the origins, composition and naming scheme of the fields in your Consume Tiles. For example, if there is a field named “Status” both in the “Ecommerce Order” and “Ecommerce Shipment” tiles, these fields will receive autogenerated names in the Consume Tile which might be difficult to work with.

Use Cases
1. Rename autogenerated field names in Consume Tile
Consume Tiles usually combine data of multiple other tiles. For example, the Consume Tile “Order Is Shipped To User” is put together out of data from the tiles “Ecommerce Order”, “Ecommerce Shipment” and “Ecommerce User”. These combinations can be viewed in the Event Matrix, mapping connections between tiles and events in the AgileData App.
During the creation of a Consume Tile the app sometimes encounters duplicate field names, such as a field named “Status” existing both in “Ecommerce Order” and “Ecommerce Shipment”. In these cases, the app automagically generates unique field names by putting the concept name in front of the old field name since duplicate field names are not allowed by the physical database tables.
This can lead long and complicated field names which are cumbersome to deal with when creating reports. By creating a simple Consume Rule these fields can be renamed at once and grouped for further analysis in Looker Studio or similar tools.
2. Create Looker Studio report with custom field selection
Using a Consume View also enables you to group fields for targeted reports concerning a specific topic or aspect of your data. By selecting only the fields you require and renaming them according to business terms or naming practices you can create unique and purpose-driven reports that only include the data you truly need.
This helps filter the fields in advance, making it easier and faster to work with them in Looker Studio or other third-party applications for data processing and data visualization. Gain clarity with accurately named and selected fields both for your data team and for the intended audience of your report!